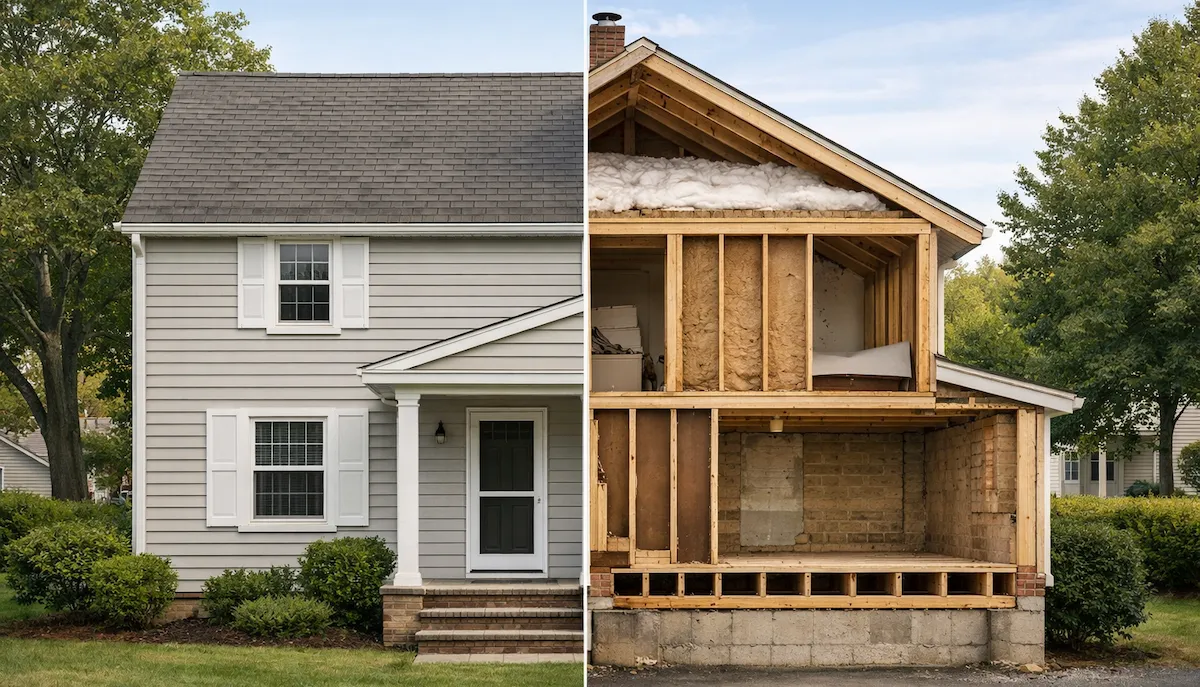
If you live in a pre-1970s home and your winter heating bills are climbing faster than the thermostat, you’ve probably been told you need to tear down drywall, blow in walls, or replace every window — projects that cost $10,000 to $30,000 and destroy the character that made you buy an older home in the first place. After 18 years of energy retrofitting and historic home renovation across the Northeast and Upper Midwest, I’ve learned that the most cost-effective insulation upgrades in older homes are almost never the ones contractors pitch first. They’re the invisible, low-disruption air-sealing and targeted insulation work that costs under $500 in materials and delivers 30–40% heating savings without touching a single wall cavity. In this guide, I’ll show you exactly where older homes leak heat, why the attic and basement are your highest-return targets, and the step-by-step method I use to cut heating bills by a third for less than the cost of a new water heater.
Why Older Homes Leak Heat (It’s Not the Walls)
Most homeowners assume their uninsulated walls are the problem. In reality, walls are rarely the best first investment in older homes.
The Stack Effect (Your Home Is a Chimney)
Older homes are drafty because of the stack effect: warm air rises, escapes through the attic, and pulls cold air in through the basement. This creates a continuous cycle of heat loss that has almost nothing to do with your walls and everything to do with your attic floor and basement rim joists.
| Heat Loss Location |
Typical % of Total Heat Loss in Older Homes |
Cost to Fix DIY |
Payback Period |
| Attic floor / ceiling |
25–35% |
$150–$300 |
1–2 years |
| Basement rim joists / sill plate |
15–20% |
$80–$150 |
1–2 years |
| Windows and doors |
15–25% |
$50–$200 |
2–4 years |
| Walls (uninsulated) |
15–20% |
$2,000–$8,000+ |
10–20 years |
| Floors over unheated spaces |
5–10% |
$100–$300 |
3–5 years |
| Electrical outlets / plumbing penetrations |
3–5% |
$20–$40 |
Immediate comfort |
The critical insight: In most older homes, the attic and basement account for 40–55% of total heat loss, and you can address both for under $400 in materials and a single weekend. Wall insulation, by contrast, requires drilling holes, removing plaster, or dense-packing cavities — and the payback is often 15+ years because walls represent a smaller percentage of the problem than most homeowners assume.
Why Walls Are the Wrong First Target
-
Thermal mass: Old plaster and lath walls have thermal mass that moderates temperature swings. Removing them to insulate destroys this benefit.
-
Moisture risk: Blowing cellulose or fiberglass into old walls without air sealing can trap moisture against the sheathing, causing rot and mold.
-
Cost per R-value: Wall insulation costs $1.50–$4.00 per square foot installed. Attic insulation costs $0.50–$1.00 per square foot installed, and the attic has no furniture, no outlets, and no finished surfaces to disturb.
The $500 Priority Stack (Where to Spend First)
This is the exact sequence I use on every older home energy audit. Do not skip steps.
| Priority |
Project |
Material Cost |
Labor |
Expected Savings |
| 1 |
Attic air seal + cellulose top-up |
$150–$250 |
1 day |
20–30% heating bill reduction |
| 2 |
Basement rim joist seal (rigid foam + caulk) |
$80–$120 |
4–6 hours |
10–15% heating bill reduction |
| 3 |
Weatherstrip doors + attic hatch |
$30–$50 |
2–3 hours |
5–10% heating bill reduction |
| 4 |
Window film + interior storms |
$60–$100 |
3–4 hours |
5–10% heating bill reduction |
| 5 |
Seal baseboard gaps + electrical boxes |
$15–$25 |
2 hours |
Comfort improvement; minor savings |
| TOTAL |
|
$335–$545 |
2–3 days |
30–50% heating bill reduction |
Pro tip from the field: I always tell clients to spend the first $500 before they even consider wall insulation. If that doesn’t make the home comfortable enough, then we talk about walls. In 18 years, I’ve only recommended wall insulation in about 20% of the older homes I’ve assessed — usually the ones with no attic access or balloon framing that bypasses the attic entirely.
Step 1: The Attic Air Seal and Top-Up (The $200 Game-Changer)
The attic is the single highest-return insulation project in any older home. Warm air rises, and if your attic floor is leaky, you’re heating the outdoors.
The Air-First Rule
Never add insulation on top of air leaks. The new insulation will filter the air, get dirty, and lose effectiveness. Seal first. Insulate second.
What to Seal
| Target |
Location |
Sealant |
Why It Matters |
| Recessed light housings |
Ceiling below attic |
Fire-rated caulk or pre-made covers |
Massive heat chimney directly into attic |
| Chimney chase / flue pipe |
Where it passes attic floor |
Fire-rated caulk + metal flashing |
Combustion safety + air sealing |
| Plumbing vent pipes |
Ceiling penetrations |
Expanding foam (fire-rated if near flue) |
Direct stack effect path |
| Wiring penetrations |
Top plates of walls |
Expanding foam or caulk |
Every wire hole is a mini chimney |
| Top plates of interior walls |
Where wall framing meets attic |
Caulk or canned foam |
Balloon framing bypasses attic floor entirely |
| Attic hatch / pull-down stairs |
Access point |
Weatherstrip + rigid foam board + latch |
Often the largest single leak in the house |
| Bathroom fan housings |
Ceiling |
Caulk around housing; insulated duct to exterior |
Warm moist air dumps into attic |
The Sealing Process
Step 1A: Prep
-
Wear a respirator, headlamp, and long sleeves. Attics are dirty.
-
Clear a walkway with plywood sheets so you don’t step through the ceiling.
-
Identify all penetrations from below first (turn on lights, look for them from the attic).
Step 1B: Seal with Caulk and Foam
-
Use acoustic sealant (remains flexible) or fire-rated caulk for gaps around chimneys and flues.
-
Use low-expansion canned foam for wiring and plumbing holes. Do not overfill — it can bow drywall.
-
Use rigid foam board (1.5-inch XPS or polyiso) cut to fit over the attic hatch, glued and screwed to the back of the hatch. Add weatherstripping tape around the rim.
Step 1C: Add Insulation Once sealed, add insulation to achieve R-49 to R-60 (climate-dependent; colder zones need more).
-
If you have 3–6 inches of old fiberglass or cellulose: Add unfaced cellulose batts or loose-fill on top to reach 14–18 inches total. Rent a blower from a home center ($75/day) or install batts by hand.
-
If you have no insulation: Install cellulose or fiberglass batts between joists, then add a perpendicular layer to eliminate thermal bridging through the joists.
Cost reality: A 1,000 sq ft attic costs roughly $150–$250 in cellulose if you install it yourself. Blown cellulose settles to R-3.5 per inch. You need 14–17 inches for R-49.
Step 2: The Basement Rim Joist Seal (The $150 Hidden Thief)
The rim joist — where your foundation wall meets the floor framing — is the second-largest leak in most older homes. It’s a 6–10 inch band of exposed wood and gaps that sits right at ground level, where cold air is densest and most eager to push in.
Why It’s Ignored
Homeowners don’t look at rim joists. They’re behind the washer, behind storage boxes, behind the furnace. But every floor joist end is a gap, and the sill plate (where the wall sits on the foundation) is often unsealed.
The Sealing Method
Step 2A: Clean and Dry Remove cobwebs, dirt, and old fiberglass (if present). The rim joist must be dry. If you see moisture, mold, or efflorescence, fix the water problem first — sealant on wet wood fails.
Step 2B: Cut Rigid Foam Cut 1.5-inch XPS (extruded polystyrene) foam board to fit each rim joist cavity. The cavity is the space between floor joists, running along the perimeter of the foundation.
Step 2C: Foam and Seal
-
Apply a bead of expanding foam around the perimeter of the cavity.
-
Press the foam board into place. It should be a tight friction fit.
-
Seal all edges with expanding foam. The goal is an airtight seal between the wood and the foam.
Step 2D: Fire Safety If the rim joist is near a furnace, water heater, or any combustion appliance, use fire-rated caulk or intumescent sealant instead of standard foam, or cover the foam with a thermal barrier (drywall or intumescent paint) per local code.
Field reality: Sealing rim joists with rigid foam costs roughly $1–$2 per linear foot in materials. A typical 1,200 sq ft home has 120–140 linear feet of rim joist. Total material cost: $80–$150. The comfort improvement is immediate — floors above feel warmer within 24 hours.
Step 3: Weatherstripping and Door Sealing (The $50 Instant Fix)
Doors are obvious leak points, but most homeowners don’t know how to diagnose which part is failing.
The Dollar Bill Test
Close a door on a dollar bill. If you can pull it out easily, the weatherstripping is compressed or missing.
The Three Door Seals
| Seal Location |
Problem |
Solution |
Cost |
| Door sweep (bottom) |
Gap under door; cold air pours in |
Adjustable aluminum sweep with rubber or brush insert |
$10–$15 |
| Jamb weatherstripping (sides/top) |
Compressed, cracked, or missing foam/vinyl |
Replace with V-strip (tension seal) or compression bulb |
$8–$12 per door |
| Threshold |
Worn or adjustable threshold no longer seals |
Replace adjustable threshold or add door shoe |
$15–$25 |
Installation Tips
-
Remove old weatherstripping completely. New over old never seals.
-
Clean the jamb with mineral spirits before applying adhesive-backed V-strip.
-
Install the door sweep so the rubber just kisses the threshold — too high and it leaks; too low and it drags and wears.
If your door frame is damaged or split, weatherstripping alone won’t fix the air leaks. A compromised frame creates gaps that no seal can bridge. If you’re dealing with a damaged frame from age, settling, or prior forced entry, my guide on
the correct way to fix a door frame split by forced entry covers the backer block and sealing techniques that restore structural integrity and airtightness before you invest in new weatherstripping.
Step 4: Window Film and Interior Storms (The $80 Seasonal Upgrade)
Replacing old windows costs $400–$1,200 per window. For most older homes, that’s a 20–30 year payback. But you can achieve 70% of the benefit for 5% of the cost.
The Shrink-Film Method
3M Indoor Window Insulator Kits or similar use a clear heat-shrink film applied with double-sided tape around the interior window frame. A hair dryer tightens the film into an invisible, drum-tight barrier.
Performance: Adds roughly R-1 to R-1.5 to the window assembly. On a single-pane window, that’s a 40–50% reduction in heat loss through the glass.
Cost: $3–$5 per window. A typical home with 15 windows: $45–$75.
Installation:
-
Clean the window trim thoroughly. Alcohol wipe ensures tape adhesion.
-
Apply double-sided tape to the outer edge of the trim (not the glass).
-
Cut film 2 inches oversize.
-
Apply film, starting at the top.
-
Shrink with a hair dryer, working from the center outward.
Critical note: The film must be applied to the trim, not the wall. If applied to the wall, the gap between trim and window frame still leaks. The film creates an air gap between the cold glass and the warm room — the trapped air is the insulation.
Interior Storm Panels
For a more permanent, reusable solution, build interior storm panels from 1×2 pine frames and clear acrylic or polycarbonate sheeting. They press into the window opening with compression fit or small turn buttons.
Cost: $15–$25 per window in materials. More labor upfront, but reusable for 10+ years.
Step 5: Insulating Behind Baseboards and Electrical Boxes (The $25 Detail)
These are small leaks, but they’re everywhere — and they add up to a continuous draft that makes a room feel cold even when the thermostat reads 70°F.
Baseboard Gaps
Remove the baseboard (use a 5-in-1 tool to cut paint lines, then pry gently). Behind it, you’ll often find a 1/4 to 1/2 inch gap between the drywall and the floor — a direct path for cold air from the wall cavity or basement to enter the room.
The fix: Apply a bead of acoustic sealant or caulk along the floor/wall junction. For larger gaps, stuff with backer rod (foam rope) and caulk over it. Reinstall the baseboard.
If your baseboards show water damage, staining, or swelling from prior leaks or condensation, sealing gaps is only part of the solution. Moisture-damaged baseboards indicate a larger envelope failure that insulation alone won’t fix. My guide on
how to restore water-damaged baseboards without full replacement covers the drying, repair, and sealing protocol that must happen before you caulk and insulate behind them — otherwise you’re trapping moisture and guaranteeing mold.
Electrical Boxes
Remove the cover plate. If the box is loose in the wall, cold air pours through the gaps. Apply foam gaskets behind the cover plate ($0.10 each). For exterior walls, fill the box cavity with low-expansion fire-rated foam around the wire entry points — but keep foam out of the box interior to avoid wire damage.
What NOT to Do (Expensive Mistakes That Waste Money)
| Mistake |
Why It Fails |
What to Do Instead |
| Blowing insulation into walls without air sealing |
Creates moisture traps; destroys plaster; minimal savings for massive cost |
Air seal attic and basement first; walls are last priority |
| Replacing all windows for energy savings |
$10,000+ cost; 20–30 year payback; frames often leak more than glass |
Window film + weatherstripping first; replace only rotted windows |
| Spray foam in walls without understanding vapor barriers |
Traps moisture in old walls; can cause sheathing rot and mold |
Use dense-pack cellulose with vapor-smart approach; hire an experienced contractor |
| Ignoring attic ventilation when adding insulation |
Blocks soffit vents; causes ice dams; overheats shingles |
Install baffles to maintain airflow from soffit to ridge vent |
| Insulating before fixing roof leaks or plumbing |
Wet insulation is worthless; mold grows in cellulose |
Fix leaks first; verify attic is dry before insulating |
| Using fiberglass batts in rim joists |
Air passes through fiberglass; it falls out; moisture condenses on cold rim joist |
Use rigid foam + canned foam for airtight seal |
When to Call an Energy Auditor or Contractor
DIY air sealing and insulation handle 80% of older home heat loss. But some situations require professional assessment.
| Situation |
Why a Pro Helps |
Cost |
| Knob-and-tube wiring in attic or walls |
Insulating over active K&T is a fire hazard; needs electrician evaluation |
$200–$400 inspection |
| Balloon framing (no top plates) |
Wall cavities open directly into attic; requires fire-blocking and specialized dense-pack |
$1,500–$4,000 |
| Severe ice damming |
Indicates complex attic airflow and insulation issues; needs blower door test |
$300–$500 audit + $1,000–$3,000 remediation |
| Mold or chronic moisture in attic or basement |
Insulation makes it worse; needs moisture source identification |
$500–$1,500 remediation |
| Asbestos insulation (vermiculite, old pipe wrap) |
Disturbing it creates health hazard; requires abatement contractor |
$2,000–$10,000 abatement |
| No attic access (flat roof, cathedral ceiling) |
Requires specialized dense-pack or spray foam from interior |
$3,000–$8,000 |
The blower door test: For $300–$500, a certified energy auditor pressurizes your home and measures air leakage with a calibrated fan. They use infrared cameras to find exactly where air is moving. This is the best $400 you can spend on an older home because it eliminates guesswork and tells you whether walls are actually leaking or if the attic is the real culprit.
FAQ
Q: Will adding attic insulation make my house too hot in summer? A: Properly installed attic insulation (with maintained ventilation) actually keeps your home cooler in summer by blocking radiant heat from the roof deck. The key is ensuring soffit vents aren’t blocked by insulation. Install vent baffles (cardboard or foam channels) between rafters where they meet the attic floor to maintain airflow.
Q: Can I insulate my attic floor if I have recessed lights? A: Only if the lights are IC-rated (Insulation Contact). If you have old non-IC cans, you must build boxes around them or replace them with IC-rated LED fixtures before covering with insulation. Packing insulation against non-IC fixtures is a fire hazard. Pre-made fire-rated covers are $15–$25 each.
Q: Is cellulose or fiberglass better for attic top-ups? A: Cellulose is superior for air sealing and density. It fills irregular cavities better, has higher R-value per inch (R-3.5 vs R-3.0 for fiberglass), and is treated with borate for fire and pest resistance. It’s also made from recycled paper. The only downside is weight — if you need more than 12 inches, verify your ceiling joists can handle the load (usually fine for standard 2×8 or larger).
Q: Should I remove old insulation before adding new? A: Only if it’s wet, moldy, or contaminated (pest droppings, asbestos). Otherwise, leave it and add unfaced batts or blown cellulose perpendicular to the joists on top. Old insulation still has R-value, and removing it disturbs fibers and creates a disposal hassle.
Q: Can I use spray foam in the rim joist instead of rigid foam? A: Yes, closed-cell spray foam is excellent for rim joists — it air seals and insulates in one step. However, it’s expensive ($1.50–$3.00 per board foot), requires professional installation or expensive rental equipment, and is irreversible. Rigid foam + canned foam is 80% as effective for 20% of the cost and is DIY-friendly.
Q: My floors are still cold after sealing the rim joist. Why? A: If your floors are over an unheated crawl space or basement, the floor itself may need insulation. However, in older homes with hardwood floors, the cold sensation often comes from air leaking through gaps between floorboards and around the perimeter where the floor meets the wall. Seal floor gaps with rope caulk or acrylic latex caulk, and ensure the baseboard gap is sealed as described in Step 5. If your hardwood floors are also squeaky, the gaps causing the noise are likely the same gaps letting cold air through — my guide on
how to fix a squeaky hardwood floor without removing boards covers the counter-snap method that pulls boards tight to the joists, which simultaneously reduces air infiltration and eliminates the squeaks that telegraph drafts.
Q: Does window film really work, or is it just a placebo? A: It works measurably. A single-pane window has an R-value of approximately 0.9. Adding interior window film creates a trapped air layer that raises the effective R-value to roughly 1.5–2.0. That doesn’t sound like much, but it’s a 40–60% reduction in heat loss through that window. The payback is one season in cold climates.
Q: Should I insulate my garage if it’s attached to the house? A: Only if you want to use the garage as a workshop. Insulating the garage wall shared with the house is already required by code in most areas. The garage door itself is a massive leak — if it’s uninsulated and weatherstripping is failing, cold air floods the garage and steals heat from the shared wall. Fix the garage door weatherstripping and bottom seal first. If your garage door is also grinding and struggling to seal properly, the mechanical issues may be creating gaps that defeat any insulation effort — my guide on
how to silence a garage door that grinds every morning covers the roller and track alignment fixes that restore proper door closure and weather sealing.
Q: Can I get rebates or tax credits for DIY insulation? A: Many utility companies offer rebates for attic insulation and air sealing even if DIY, though some require a pre- and post-work energy audit. The federal Energy Efficient Home Improvement Credit (25C) offers 30% of costs up to $1,200 per year for insulation and air sealing materials. Save your receipts. Check DSIRE (Database of State Incentives for Renewables & Efficiency) for local programs.
Q: How do I know if my walls are balloon-framed? A: Balloon framing (common in homes built before 1940) has wall studs that run continuously from the foundation to the attic, with no top plate blocking the cavity. You can verify by removing an outlet cover on an exterior wall and shining a flashlight up the cavity — if you see open space all the way to the attic, it’s balloon framing. This is a major fire and air-sealing concern that requires fire-blocking at the top and bottom of walls before any insulation work.
Conclusion
The most cost-effective way to insulate an older home is not to insulate the walls — it’s to stop the air from escaping through the attic floor, the basement rim joist, and the dozens of small gaps around doors, windows, baseboards, and electrical boxes. These are the paths of the stack effect, and they account for the majority of heat loss in most pre-1970 homes.
Start with the attic. Seal every penetration with caulk and foam. Top up with cellulose to R-49 or higher. Then move to the basement and seal the rim joist with rigid foam. Weatherstrip the doors. Shrink-film the windows. Seal behind the baseboards and outlet covers.
Total cost: $335–$545. Total time: two to three weekends. Total heating bill reduction: 30–50% in most climates. Total disruption: zero walls opened, zero plaster destroyed, zero rooms unusable.
And remember: insulation is only half the battle. Air sealing is the other half. A perfectly insulated attic with a leaky hatch is like a winter coat with the zipper stuck open. Seal first. Insulate second. Test with a blower door if you’re unsure where the leaks are.
Last updated: June 2026 | Insulation and air sealing procedures reflect current building science and energy efficiency standards. Follow local codes regarding fire blocking, combustion safety, and vapor barriers. Consult a certified energy auditor or contractor for homes with knob-and-tube wiring, asbestos, or balloon framing.
About the author: I’m an energy retrofit specialist and historic home renovation consultant with 18 years of hands-on experience performing blower door testing, attic air sealing, and basement rim joist insulation across the Northeast and Upper Midwest. I’ve guided hundreds of homeowners through low-cost, high-return envelope improvements that preserve the character of older homes while cutting heating bills by a third. I write detailed guides so you can achieve professional energy performance without professional invoices — and without destroying the plaster and trim that make your old home worth living in.