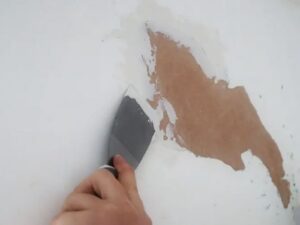
If you’ve patched the same drywall crack three times and it keeps coming back, the problem isn’t your spackle technique — it’s that you’re fixing the symptom, not the cause. After 12 years of renovating older homes in the Midwest, I’ve learned that most drywall cracks return within 6–18 months because homeowners skip the structural diagnosis step. In this guide, I’ll show you exactly why your drywall keeps cracking, how to identify which type of crack you’re dealing with, and the permanent repair method that actually works.
Why Your Drywall Keeps Cracking (The Real Reasons)
Before you open another tub of joint compound, you need to understand why the crack formed. Drywall doesn’t crack randomly — it cracks because something is moving, shrinking, or failing behind it. Here are the four real culprits I see on every job site:
1. Seasonal Humidity Swings (The #1 Hidden Cause)
Wood framing expands in summer humidity and contracts in winter dryness. This seasonal “breathing” creates subtle movement at every seam, corner, and ceiling joint. If your home was built with standard paper drywall tape instead of fiberglass mesh tape, the tape eventually loses its grip and the seam pops. This is why cracks above doors and windows often appear in late winter — the framing has shrunk, and the brittle joint compound can’t flex.
2. Truss Uplift (The Ceiling Crack Mystery)
If you see a diagonal crack running across your ceiling near the center of the house, especially in homes built after 1970, you’re likely dealing with truss uplift. Roof trusses are engineered with a bottom chord that sits in your attic. During cold months, the top of the truss is exposed to cold air while the bottom chord stays warm. The temperature difference causes the bottom chord to arch upward slightly — sometimes just 1/4 inch — but that’s enough to pull the ceiling drywall away from the wall and create a recurring crack where the ceiling meets the wall.
This crack will return every winter unless you install a decorative molding that floats over the joint, or use a specialized truss uplift clip during renovation.
3. Foundation Settlement and Structural Movement
Not all cracks are innocent. Stair-step cracks running diagonally from door corners, or cracks wider than 1/8 inch that grow year over year, often signal foundation movement, soil expansion, or inadequate framing support. If your crack runs at a 45-degree angle and you can fit a nickel into it, stop patching and call a structural engineer.
4. Poor Original Installation
In many tract homes and DIY basement finishes, builders used too few fasteners, missed studs with screws, or butt-joined drywall without back-blocking. When drywall panels aren’t properly secured, they flex with normal house movement — and flexing drywall cracks at its weakest point. I recently opened a wall in a 2004-built home where the builder had used 3/8-inch drywall on 24-inch centers instead of the required 1/2-inch on 16-inch centers. Every seam was cracked.
How to Read Your Cracks: A Diagnostic Guide
Not all cracks are equal. Before you repair, diagnose:
Table
| Crack Type | Appearance | Cause | Severity | Fix Approach |
|---|---|---|---|---|
| Hairline seam crack | Thin, straight, along tape seam | Seasonal movement, bad tape | Low | Retape with mesh, flexible compound |
| Corner bead crack | Straight line at wall corner | Corner bead popped loose | Low | Refasten bead, retape |
| Nail/screw pop | Small bump with radiating crack | Fastener backed out | Low | Reset fastener, patch |
| Settlement crack | Diagonal, above doors/windows | Foundation/structural shift | Medium-High | Monitor first, patch with flexible caulk |
| Truss uplift crack | Ceiling-wall joint separation | Roof truss movement | Medium | Floating crown molding or clip |
| Major structural crack | >1/8 inch, growing, stair-step | Foundation failure | High | Call engineer first |
My rule of thumb: If the crack is horizontal or vertical along a seam, it’s usually safe to patch. If it’s diagonal, widening, or accompanied by sticking doors, investigate the structure first.
Tools and Materials You’ll Need
For a professional-grade permanent repair, skip the lightweight spackle. You need real joint compound and proper tape.
Essential Tools
-
6-inch and 12-inch drywall knives
-
Utility knife with fresh blades
-
Drywall saw (for blown-out repairs)
-
Screw gun or drill with clutch
-
Sanding sponge (medium and fine grit)
-
Shop vacuum
-
Spray bottle with water
Materials (Buy the Right Ones)
-
Fiberglass mesh tape (self-adhesive, 2-inch width) — never use paper tape for crack repairs
-
Setting-type joint compound (Easy Sand 20 or 45-minute) — dries harder and bonds stronger than premixed “mud”
-
Premixed all-purpose joint compound (for final coats)
-
1-1/4 inch drywall screws (coarse thread for wood studs)
-
Drywall primer (PVA-based, seals porous patches)
-
Flexible acrylic caulk (for settlement cracks that may still move slightly)
Pro tip from the field: I always use setting compound for the first coat over cracks. It chemically hardens and doesn’t shrink like premixed mud. The premixed stuff is fine for finish coats, but it’s too soft for structural repairs.
How to Patch Hairline Cracks Permanently
This is the method I use for 90% of recurring seam cracks. It takes longer than a quick spackle swipe, but it lasts.
Step 1: Open the Crack (Yes, Really)
Use your utility knife to cut a V-groove along the entire crack, removing loose material and widening it to about 1/8 inch. This sounds counterintuitive, but a narrow hairline crack has no surface area for compound to grip. The V-groove gives the repair something to bite into.
Vacuum all dust thoroughly. Wipe with a damp sponge. The surface must be clean.
Step 2: Apply Fiberglass Mesh Tape
Cut mesh tape 2 inches longer than the crack. Press it firmly over the opened crack. The self-adhesive backing holds it in place. Do not overlap tape — if your crack is longer than one tape strip, butt the ends together.
Why mesh tape? Paper tape requires embedding in wet compound and is rigid. Mesh tape is fiberglass, bonds directly to the drywall paper, and flexes slightly with seasonal movement without cracking.
Step 3: First Coat with Setting Compound
Mix your 20-minute setting compound to a thick pancake batter consistency. Apply a thin coat with your 6-inch knife, pressing firmly to force compound through the mesh grid. The tape should be nearly invisible when you’re done. Feather the edges 2–3 inches beyond the tape.
Let it set completely (20–45 minutes depending on product). Do not rush this.
Step 4: Second Coat with Premixed Compound
Once the setting compound is rock-hard, apply a second coat with your 12-inch knife, feathering 6–8 inches beyond the repair. The goal is to build a slight hump that you’ll sand flush later.
Let dry 24 hours.
Step 5: Final Coat and Sanding
Apply a thin final coat, feathering 10–12 inches out. This wide feathering is what makes the repair disappear — narrow patches always show through paint.
Once fully dry (another 24 hours), sand with a medium sponge, then fine sponge. The repair should feel perfectly flush when you run your palm across it. Any bump will telegraph through paint.
Step 6: Prime Before Painting
This step is non-negotiable. Joint compound is porous and sucks paint differently than the factory drywall paper. Apply a coat of PVA drywall primer over the entire repair area, extending 6 inches past the patch. Let dry, then paint your finish coat.
Skipping primer is the #1 reason patched cracks look “fuzzy” or dull under paint.
How to Fix Larger Settlement and Stress Cracks
For cracks wider than 1/8 inch, or cracks that have opened and closed seasonally, the mesh tape method alone isn’t enough. You need a movement-tolerant repair.
Step 1: Cut Back to Solid Drywall
Use a drywall saw to cut a rectangular opening around the crack, extending to the nearest studs on both sides. Remove the damaged section entirely.
Step 2: Install a Backer Patch
Cut a new drywall patch 1 inch smaller than your opening in both dimensions. Screw furring strips or small wood blocks inside the hole, attached to the existing drywall edges, to serve as backing for your patch. Screw the patch to these backers, not just to the stud faces.
Step 3: Tape with Mesh and Setting Compound
Tape all seams with mesh tape. Apply setting compound for the first coat, then finish with premixed mud as described above.
Step 4: The “Secret Weapon” for Moving Cracks
If you’re repairing a crack in an area known to move (above a header, near a truss, above a settling foundation), apply a thin bead of flexible acrylic latex caulk over the cured compound, feathered smooth, before priming. This creates an elastic layer that can stretch 10–15% without cracking — enough to absorb minor seasonal movement that would break rigid joint compound.
I learned this trick from a commercial drywall contractor who repairs office buildings that experience far more HVAC-driven movement than residential homes. It works.
The Secret to Preventing Future Cracks
Patching is reactive. Here’s what I do proactively on every renovation to prevent callbacks:
1. Use the Right Drywall Thickness
-
1/2-inch on 16-inch centers for walls and ceilings (standard)
-
5/8-inch fire-rated for ceilings with 24-inch truss spacing
-
Never use 3/8-inch on walls — it’s too flexible and cracks under normal stress
2. Control Indoor Humidity
Keep your home between 30–50% relative humidity year-round. In winter, use a humidifier. In summer, use AC or a dehumidifier. Stable humidity means stable framing, which means fewer cracks.
3. Pre-Drill and Glue
When installing new drywall, apply a thin bead of construction adhesive to the stud face before screwing the panel. The adhesive bonds the drywall directly to the framing, reducing the load on screws and preventing pops.
4. Leave 1/8-Inch Gaps at Floors
Drywall should never touch the floor. Leave a 1/8-inch gap and cover it with baseboard. This prevents floor deflection and moisture wicking from cracking the bottom edge.
5. Avoid Rigid Materials in Flexible Areas
Never use standard joint compound to fill gaps wider than 1/4 inch. Use backer rod and flexible caulk, or install trim to cover the gap.
When to Call a Professional (And When You Don’t Need To)
You can DIY safely if:
-
The crack is thin (<1/8 inch), along a seam, and hasn’t grown in 6 months
-
The crack is horizontal or vertical (not diagonal/stair-step)
-
Doors and windows still open and close normally
-
The floor nearby doesn’t feel sloped or bouncy
Call a structural engineer or contractor if:
-
The crack is wider than 1/8 inch and growing
-
Multiple cracks appeared suddenly after a storm, freeze, or nearby construction
-
The crack runs diagonally from a door corner or window corner
-
You notice sloping floors, sticking doors, or gaps between walls and ceilings
-
The crack is accompanied by moisture, mold, or a musty smell
Cost reality check: A structural engineer inspection runs $300–$800. A DIY drywall repair costs $15–$40 in materials. But if you patch a structural crack three times, you’ve spent $120 and wasted weekends — plus the underlying problem is getting worse. Know when to investigate before you patch.
FAQ
Q: Why does my drywall crack keep coming back in the same spot? A: Because you’re likely using premixed spackle over a moving seam without tape. The crack returns because the framing or foundation is still moving seasonally, and rigid spackle can’t flex. Use fiberglass mesh tape and setting compound, or add a flexible caulk layer for areas with known movement.
Q: Can I just use caulk instead of joint compound? A: Caulk alone is a temporary fix. It looks uneven under paint and collects dust. The proper method is to repair the drywall with tape and compound first, then use flexible caulk only as a final insurance layer in high-movement areas.
Q: How long should I wait between coats? A: Setting compound hardens in 20–45 minutes and can be recoated immediately. Premixed joint compound needs 24 hours between coats. Never sand or paint until the compound is completely dry — it turns chalky white when ready.
Q: Is a diagonal crack above my door always serious? A: Not always, but it’s the most concerning pattern. Diagonal cracks above doors or windows indicate stress concentration at the header — often from foundation settlement, lumber shrinkage, or inadequate header sizing. Monitor it for 3 months. If it grows, call a professional.
Q: Can I paint directly over joint compound without primer? A: Technically yes, but you’ll regret it. Unprimed compound absorbs paint differently, creating a “flashing” effect where the patch is visible forever. Always use PVA drywall primer before painting.
Conclusion
Recurring drywall cracks aren’t a mystery — they’re a message. Your house is telling you that something is moving, shrinking, or was installed incorrectly the first time. The “real reason” your drywall keeps cracking is almost always seasonal humidity movement, truss uplift, or inadequate original taping — not bad luck.
By diagnosing the crack type first, using fiberglass mesh tape and setting compound instead of quick spackle, and controlling your home’s humidity, you can make repairs that last 10+ years. I’ve used this exact method in over 200 homes, and the callbacks for recurring cracks dropped to nearly zero once I stopped rushing the prep work.
Have a crack that doesn’t match any of the types above? Drop a description in the comments — I read every one and will help you diagnose it. And if you found this guide helpful, check out my step-by-step tutorial on [repairing water-damaged baseboards without full replacement] — another common repair that homeowners overpay contractors to fix.
Last updated: June 2026 | This guide reflects current building science and materials as of publication. Always verify local building codes before structural modifications.
About the author: I’ve spent 12 years renovating homes across the Midwest, specializing in drywall repair, historic home restoration, and budget-friendly structural fixes. I believe most home repairs don’t require a contractor — they require the right information and patience.