Having a few reliable tools at home can make everyday maintenance much easier. A loose cabinet handle, crooked picture frame, sticking door, damaged shelf, or small repair does not always require a professional visit. Sometimes the job only needs a screwdriver, tape measure, wrench, or drill.
The important word is safely.
A tool can save time when used correctly, but the same tool can cause an injury or damage your home when used carelessly. Beginners often focus on getting the repair finished and forget about preparation, protective equipment, or choosing the correct tool for the material.
You do not need to become an experienced tradesperson to handle basic DIY work. You simply need to understand what common tools are designed to do, how to use them properly, and when a project has moved beyond your skill level.
This guide covers the essential DIY tools many homeowners can benefit from keeping at home, along with practical safety advice for using them.
Build a Basic Toolbox First
Before buying specialist equipment, start with tools that can handle several common household jobs.
A practical beginner’s toolbox might include:
- Screwdriver set
- Adjustable wrench
- Pliers
- Claw hammer
- Tape measure
- Spirit level
- Utility knife
- Hex key set
- Drill and suitable bits
- Work gloves
- Safety glasses
You may eventually add more tools as you discover which types of repairs you regularly perform.
There is no need to buy everything at once.
Choose good-quality basic tools that feel comfortable in your hand. A cheap tool that slips, bends, or breaks can make a simple job harder and less safe.
Screwdrivers
Screwdrivers are among the most useful tools for household maintenance.
They can be used for cabinet hardware, door handles, electrical cover plates, furniture assembly, appliance components, and many other tasks.
Common types include Phillips, slotted, Pozidriv, and Torx screwdrivers.
Using the correct type matters.
A screwdriver that does not properly match the screw can slip out of the head. This may damage the screw and cause the tool to strike your hand.
How to Use a Screwdriver Safely
Choose a screwdriver that fits the screw properly.
Keep the handle dry and maintain a firm grip.
Push the screwdriver into the screw while turning rather than applying excessive sideways pressure.
Do not use a screwdriver as a chisel, pry bar, or makeshift punch.
Keep your other hand away from the path of the screwdriver in case it slips.
If a screw is difficult to remove, stop and investigate why rather than immediately applying extreme force.
Adjustable Wrench
An adjustable wrench is useful for many basic plumbing and mechanical tasks.
It has a movable jaw that allows it to fit different nut sizes.
The wrench should fit the nut closely.
If the jaws are too loose, the wrench can slip and round the edges of the nut.
Safe Wrench Technique
Position the wrench so that force is applied in a controlled direction.
Keep your fingers away from pinch points.
Do not extend the wrench with another object to gain extra leverage unless the tool is specifically designed for that purpose.
If a fitting is extremely tight, corroded, or connected to delicate plumbing, forcing it may cause damage.
Pliers
Pliers are useful for gripping, holding, bending, and sometimes cutting suitable materials.
Common types include combination pliers, long-nose pliers, locking pliers, and cutting pliers.
Do not assume every pair of pliers can safely cut any wire.
The tool should be rated for the material and task.
Using Pliers Safely
Grip the object firmly without crushing it unnecessarily.
Keep fingers away from the jaws.
Never use pliers as a substitute for a wrench when working on nuts and bolts because they can damage the fastener.
When using cutting pliers, wear appropriate eye protection if the material could snap or create flying fragments.
Never cut electrical wiring unless you are qualified and the circuit has been properly isolated according to applicable safety requirements.
Claw Hammer
A hammer is useful for driving suitable nails, removing nails, and performing basic carpentry tasks.
Choose a hammer that you can control comfortably.
A very heavy hammer is not automatically better.
Before using it, inspect the handle and head.
A damaged or loose hammer can become dangerous during use.
Hammer Safety
Wear safety glasses when there is a possibility of material breaking or flying.
Keep your free hand away from the striking area.
Use the correct nail or fastener for the material.
Do not strike hardened metal objects with a general-purpose hammer unless the tool and task are designed for that use.
When removing a nail, position the claw securely before applying controlled pressure.
Tape Measure
A tape measure seems simple, but accurate measuring is one of the most valuable DIY skills.
It can prevent you from buying the wrong shelf, curtain, door hardware, flooring quantity, or piece of furniture.
Before measuring, make sure you know exactly what dimension you need.
For example, measuring the width of a window is different from measuring the space available for a curtain rail.
Measuring More Accurately
Keep the tape straight.
Do not allow it to sag when measuring longer distances.
For important projects, measure twice before cutting or buying materials.
Write measurements down immediately.
If another person is helping, have one person hold the tape while the other records the measurement.
That extra minute can save a costly mistake.
Spirit Level
A spirit level helps you determine whether a surface is horizontal or vertical.
It is particularly useful for shelves, pictures, curtain rails, cabinets, and wall-mounted items.
Place the level directly against the surface being checked.
Look at the bubble rather than judging alignment by eye.
For longer shelves or rails, check the level across the full length.
Why It Matters
A shelf can appear straight when viewed from across a room but still be noticeably tilted.
Using a spirit level makes the result more accurate and professional-looking.
Utility Knife
A utility knife is useful for opening packaging, cutting suitable materials, trimming cardboard, and some DIY preparation work.
It is also one of the easiest tools to misuse.
Always cut away from your body.
Keep your free hand out of the cutting path.
Use a sharp blade rather than forcing a dull one.
A dull blade often requires more pressure and is therefore more likely to slip.
Retract or cover the blade when it is not being used.
Store replacement blades safely and dispose of used blades in a suitable container.
Cordless Drill
A cordless drill can make many home projects much faster.
It is useful for drilling suitable holes, installing screws, assembling furniture, and completing many basic repair jobs.
However, a drill should not be treated as a universal tool.
Different materials require different drill bits.
Wood, metal, masonry, tile, and other surfaces each have their own requirements.
How to Use a Drill Safely
Before drilling into a wall, determine what may be behind it.
Electrical cables, pipes, and other services can be hidden inside walls.
Use appropriate detection methods where necessary and follow local safety guidance.
Wear eye protection when drilling.
Secure the workpiece if you are drilling into loose material.
Select the appropriate drill bit and speed for the material.
Keep both hands under control and avoid forcing the drill.
If the drill bit becomes stuck, release the trigger and allow it to stop completely before attempting to correct the problem.
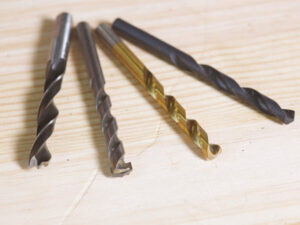
Choose the Correct Drill Bit
Drill bits are not interchangeable.
A bit designed for wood may perform poorly on masonry.
A masonry bit is designed for hard mineral-based materials.
Some surfaces, such as tiles, require specialised bits and careful technique to reduce the risk of cracking.
Using the correct bit improves the result and can reduce unnecessary damage.
Hex Keys
Hex keys, sometimes called Allen keys, are commonly used for flat-pack furniture, bicycle components, furniture fittings, and various household hardware.
They are inexpensive and take up little space.
Choose the correct size.
A key that is too small can damage the fitting.
When tightening furniture, avoid excessive force because it can damage threaded inserts or softer materials.
Level and Measuring Tools
A few simple measuring tools can dramatically improve DIY results.
A tape measure handles distance.
A spirit level checks alignment.
A pencil or suitable marking tool allows you to identify drilling or cutting points.
Use these tools together.
Measure the space.
Mark the location.
Check the alignment.
Then drill or install.
This process is slower than guessing for the first minute but much faster than repairing a badly positioned installation.
Safety Glasses
Safety glasses are easy to overlook because they do not actually repair anything.
They protect one of the most vulnerable parts of your body: your eyes.
Wear them when drilling, cutting, sanding, hammering, or performing tasks where fragments or dust may become airborne.
Ordinary glasses are not necessarily a substitute for appropriate protective eyewear.
Choose safety glasses designed for the work you are doing.
Work Gloves
Work gloves can protect your hands from splinters, sharp edges, dirt, and some minor abrasions.
However, gloves are not appropriate for every power tool.
Loose material around rotating machinery can create additional hazards.
Follow the safety instructions for the specific tool.
For basic handling, gardening, moving rough timber, or similar tasks, properly fitting gloves can be useful.
Dust Mask or Respiratory Protection
Some DIY projects produce dust.
Sanding wood, cutting certain materials, and working with dusty surfaces can expose you to airborne particles.
The appropriate respiratory protection depends on the material and level of exposure.
Do not assume a basic disposable mask is suitable for every type of dust.
For older buildings or materials that may contain hazardous substances, stop work and seek appropriate advice rather than disturbing the material.
Wall Fixings
Wall fixings are not exactly tools, but they are essential for safe DIY installations.
Different walls require different fixing systems.
A solid masonry wall, plasterboard wall, and timber stud can behave very differently under load.
Before installing a shelf, cabinet, mirror, or other heavy item, identify the wall construction.
Choose a fixing rated for the expected load.
Do not rely on a generic plastic plug for every wall.
Why Wall Type Matters
Imagine installing a heavy shelf.
The screw itself might be strong, but if the wall fixing cannot hold the load, the entire shelf can pull away.
The safest installation depends on the complete system: wall material, fixing, screw, bracket, and load.
Sandpaper and Sanding Blocks
Sandpaper is useful for smoothing filled holes, preparing painted surfaces, refinishing suitable furniture, and removing minor roughness.
Choose the appropriate grit for the job.
Coarse paper removes material quickly.
Fine paper produces a smoother finish.
Do not aggressively sand surfaces when you do not know what the existing coating contains.
Older properties can contain materials that require specialist handling.
When sanding, control dust and wear appropriate eye and respiratory protection for the material involved.
A Step-by-Step Safe DIY Routine
Good tool safety starts before the tool touches the material.
Step 1: Understand the Job
Know what you are trying to repair.
Do not begin dismantling something simply because you cannot see the cause.
Step 2: Check the Manufacturer’s Instructions
For power tools, fittings, sealants, appliances, and specialist materials, read the instructions.
The manufacturer’s guidance may contain important limitations.
Step 3: Prepare the Work Area
Remove clutter.
Keep children and pets away from the work zone.
Make sure you have enough light.
Step 4: Wear Appropriate Protection
Use eye, hand, hearing, respiratory, or other protection when the task requires it.
Step 5: Check Your Tools
Look for damaged cables, cracked handles, loose components, blunt blades, and other defects.
Do not use damaged tools simply because the job will only take five minutes.
Step 6: Work Slowly
Control is more important than speed.
Step 7: Clean Up
Return sharp tools to safe storage.
Remove debris and dispose of damaged blades or other hazardous waste appropriately.
Common DIY Tool Mistakes
Using the Wrong Tool
Trying to use a butter knife as a screwdriver or pliers as a wrench may seem harmless for a quick job.
It is not a good habit.
The tool may slip, break, or damage the component.
Applying Too Much Force
More force does not necessarily mean a better repair.
If something will not move, stop and determine why.
It may be corroded, seized, incorrectly fitted, or under tension.
Ignoring Damaged Tools
A cracked hammer handle or damaged drill cable should not be treated as a minor inconvenience.
Replace or repair the tool appropriately before using it again.
Drilling Without Checking Behind the Wall
This is one of the most important mistakes to avoid.
Know what may be hidden behind the surface before drilling.
Leaving Tools Accessible
Sharp blades, drills, and other equipment should be stored safely, particularly in homes with children or pets.
Forgetting to Unplug or Isolate Equipment
When maintaining power tools or working on equipment, follow the manufacturer’s instructions for disconnecting power.
Never work on an electrical system simply because you think a switch is turned off.
When You Should Hire a Professional
DIY is not about proving that you can fix everything yourself.
Some tasks should be handled by appropriately qualified professionals.
These may include major electrical work, gas work, structural alterations, serious plumbing problems, roof work at dangerous heights, and jobs involving potentially hazardous building materials.
If a problem could cause fire, electrocution, flooding, structural damage, or serious injury, the cost of professional assistance may be worthwhile.
Knowing when to stop is part of being a capable DIY homeowner.
How to Store DIY Tools Properly
Tool storage affects both safety and tool life.
Keep tools dry.
Store sharp objects with their blades protected.
Keep power tools away from moisture.
Recharge cordless tool batteries according to the manufacturer’s instructions.
Avoid leaving tools scattered across floors, stairs, or walkways.
A simple toolbox or storage cabinet can make it easier to find what you need and reduce the chance of accidental injury.
Check Your Tools Before Every Project
You do not need to perform a formal inspection every time you pick up a screwdriver.
However, before using a power tool or any tool that will be exposed to significant force, take a quick look.
Check for:
- Cracks
- Loose handles
- Damaged cables
- Worn blades
- Broken switches
- Corrosion
- Missing guards
- Loose components
A few seconds of checking can identify an obvious problem before work begins.
Final Thoughts
You do not need a professional workshop to handle many everyday home maintenance tasks.
A small collection of quality hand tools, basic measuring equipment, a suitable drill, and appropriate safety gear can help you tackle simple repairs with greater confidence.
But owning tools is only half the job.
The other half is learning how to use them responsibly.
Choose the correct tool. Match it to the material. Prepare your work area. Wear suitable protection. Read instructions when necessary. Never rush a repair simply because it appears easy.
Most importantly, recognise the boundary between a straightforward DIY task and a job that presents serious risks.
The best DIY homeowners are not the people who attempt every repair themselves. They are the people who know what they can safely handle, complete those jobs carefully, and know when professional help is the smarter choice.
Frequently Asked Questions
What are the most important DIY tools for a homeowner?
A screwdriver set, adjustable wrench, pliers, hammer, tape measure, spirit level, utility knife, drill, suitable drill bits, and basic safety equipment are useful starting points.
What should I buy first for a basic toolbox?
Start with versatile hand tools such as screwdrivers, pliers, a hammer, adjustable wrench, tape measure, and spirit level. Add power tools as your projects require them.
Is a cordless drill safe for beginners?
A cordless drill can be suitable for beginners when used correctly. Read the manufacturer’s instructions, wear eye protection, select the correct drill bit, and check for hidden pipes and cables before drilling into walls.
Why do I need different screwdriver types?
Different screws have different head designs. Using the correct screwdriver improves grip and reduces the chance of damaging the screw or having the tool slip.
Can I use pliers instead of a wrench?
It is generally better to use the correct tool. Pliers may damage the edges of nuts and bolts because their jaws are designed primarily for gripping rather than fitting a fastener precisely.
What safety equipment should I keep at home?
Safety glasses are useful for many DIY tasks. Depending on the project, you may also need suitable gloves, hearing protection, respiratory protection, or other protective equipment.
How do I know whether a wall fixing is suitable?
Identify the wall material and the weight of the item being mounted. Choose a fixing designed for that wall type and load rather than assuming one fixing works everywhere.
Should I use gloves with power tools?
It depends on the tool and manufacturer’s safety guidance. Loose gloves can create hazards around some rotating equipment, so always follow the specific safety instructions for the tool.
When should I stop a DIY project?
Stop when the job involves risks you cannot confidently manage, when you discover hidden wiring or plumbing, when structural damage is suspected, or when the work involves gas, major electrical systems, hazardous materials, or dangerous heights.
How can I make DIY repairs safer?
Prepare the work area, use the correct tools and materials, wear appropriate protective equipment, inspect tools before use, work slowly, and follow manufacturer instructions.
How should I store sharp DIY tools?
Keep blades covered or retracted and store sharp tools where they cannot accidentally injure someone. A secure toolbox or dedicated storage cabinet is a practical option.