Small home problems rarely arrive at a convenient time. A dripping tap starts when you are getting ready for work. A door suddenly sticks when you are carrying groceries. A loose shelf begins to pull away from the wall, or a small patch of peeling paint makes an otherwise tidy room look neglected.
Many of these problems do not require a major renovation. With a few basic tools, the right materials, and a little patience, homeowners and renters can handle a surprising number of simple DIY home repairs.
The important part is knowing what you can safely fix yourself and what should be left to a qualified professional. A loose cabinet handle is one thing. A gas leak, serious electrical fault, or structural problem is something else entirely.
This guide focuses on practical household repairs that beginners can understand and, where appropriate, complete safely.


Start by Finding the Real Cause
One of the biggest DIY mistakes is repairing the visible symptom without finding out why it happened.
For example, a patch of peeling paint may look like a painting problem. However, if water is entering through a damaged seal or leaking pipe, repainting the wall will only hide the problem temporarily.
Similarly, if a door keeps becoming loose after you tighten its screws, the issue may be damaged hinges, stripped screw holes, or movement in the frame.
Before reaching for your toolbox, spend a few minutes observing the problem.
Ask yourself:
- When did the problem begin?
- Has it become worse?
- Is water, electricity, heat, or movement involved?
- Has the same repair failed before?
- Can I safely access the affected area?
- Do I know what is behind the surface?
This simple check can prevent unnecessary work and help you choose the right repair.
Build a Basic DIY Repair Kit
You do not need a professional workshop for ordinary household maintenance.
A basic toolkit can include a screwdriver set, adjustable wrench, pliers, claw hammer, tape measure, spirit level, utility knife, drill, suitable drill bits, and a selection of screws and wall fixings.
It is also sensible to keep safety glasses and work gloves available.
The most important thing is not owning every possible tool. It is having the correct tool for the particular job.
Using the wrong screwdriver can damage a screw head. Using the wrong wall plug can cause a shelf to pull out. Using excessive force can damage plastic plumbing fittings.
Good DIY work is usually controlled rather than forceful.


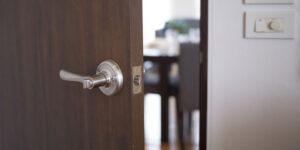
Fix a Loose Door Handle
A loose door handle is one of the easiest household problems to investigate.
Start by checking the visible screws. If they have become loose, tighten them with the correct screwdriver.
Do not overtighten them. Too much force can damage the screw, handle, or material around the fixing.
If the handle becomes loose again shortly after tightening, look more closely at the mounting mechanism.
The screws may no longer have enough material to grip. The internal mechanism could also be worn or damaged.
If the handle is damaged, replacing the complete handle may be more practical than repeatedly tightening it.
A Useful Tip
Take the old handle with you when buying a replacement if possible. If that is not practical, measure the important dimensions, including the distance between mounting holes and the size of the door opening.
A small measurement before shopping can prevent an unnecessary return trip.
Repair a Door That Sticks
A sticking door is often caused by alignment rather than a major defect.
Open and close the door slowly and look for the point where it rubs against the frame.
Then inspect the hinges.
Loose hinge screws can allow the door to shift slightly. Tightening them may solve the problem.
Changes in humidity can also affect wooden doors. A door that worked perfectly during one season may become harder to close during another.
Do not immediately sand or cut the door.
First determine whether the problem is caused by loose hinges, frame movement, swollen wood, or another issue.
If the door is rubbing heavily or the frame appears to have moved, the underlying cause may need further investigation.


Stop a Door Hinge From Squeaking
A squeaky hinge is usually caused by friction between moving parts.
Apply a small amount of suitable lubricant to the hinge. Move the door back and forth several times so the lubricant can work into the moving areas.
Wipe away excess.
If the squeak returns quickly, check whether the hinge is loose, damaged, or corroded.
Simply adding more lubricant repeatedly may hide the symptom without addressing the actual problem.
Fix Small Holes in Walls
Small holes from nails, screws, or wall hooks are common in almost every home.
For a minor hole, remove loose material around the opening and apply a suitable wall filler.
Allow the filler to dry according to the product instructions. Sand the repaired area carefully until it is reasonably smooth, then prime or paint as required.
Do not rush the drying stage.
Painting over filler that has not dried properly can leave an uneven surface.
What About Larger Cracks?
Not every crack is a serious structural problem, but not every crack should be treated as a cosmetic defect either.
A small surface crack may result from normal movement or changes in temperature and humidity.
However, cracks that are widening, repeatedly returning, unusually large, or associated with sticking doors, windows, or other signs of movement deserve closer attention.
Do not simply fill a potentially significant crack and forget about it.


Deal With a Dripping Tap
A dripping tap is annoying, but it can also indicate a worn internal component.
Before taking the tap apart, shut off the appropriate water supply and open the tap briefly to release pressure.
The repair depends on the type of tap.
Some taps use washers, while others use cartridges or ceramic mechanisms.
If you need to replace an internal component, take photographs as you remove each part. This gives you a visual reference when putting everything back together.
Use the correct replacement component rather than forcing a similar-looking part into place.
After reassembly, restore the water supply slowly and inspect the tap carefully for leaks.
If the tap still leaks or you cannot determine where the water is coming from, stop and seek appropriate help.
Repair a Leaking Pipe Under the Sink
A small leak under a sink should be investigated promptly.
Place a container beneath the pipework before loosening anything. This catches water that may remain inside the trap or pipe.
Check accessible connections first.
Sometimes a connection has simply loosened. In other cases, a seal may have deteriorated.
Plastic fittings should not be tightened aggressively. Too much force can damage the fitting and create another leak.
After making the repair, run water slowly and inspect every connection.
If water continues to leak, or the source is inside a wall or inaccessible area, professional assistance may be needed.


Unblock a Slow Drain
A slow drain is often caused by accumulated hair, soap residue, grease, or other debris.
Start with the simplest approach.
Remove the drain cover if appropriate and clean away visible material.
For a suitable blockage, a plunger may help loosen the obstruction.
Avoid repeatedly pouring strong chemical drain cleaners into plumbing without checking whether the product is suitable for your plumbing system.
If several drains become slow at the same time, or wastewater starts backing up, the problem may be farther into the drainage system.
That is no longer the same as cleaning a simple sink blockage.
Fix a Running Toilet
A toilet that continues running after flushing usually has an issue with its filling or flushing mechanism.
If your toilet design allows access to the cistern, remove the lid carefully and observe what happens during a flush.
Look at the water level, float, valve, and flush mechanism.
Sometimes the float is incorrectly positioned or a seal has worn out.
Replacement mechanisms are available for many toilet designs, but they are not universal.
Do not force a plastic component or adjust something without understanding its purpose.
If the toilet cannot be isolated from the water supply or the problem continues after a straightforward adjustment, consider getting professional help.


Replace Damaged Silicone Around a Sink or Bath
Old silicone can become cracked, separated, stained, or mouldy.
When the seal fails, water can reach areas that are not designed to stay wet.
The correct approach is to remove the old sealant rather than simply adding a new layer on top.
Clean the surface thoroughly and allow it to dry.
Apply a suitable sealant according to the manufacturer’s instructions and create a neat finish before it cures.
If there is already water damage underneath the sink, bath, or worktop, repairing the silicone alone will not solve the problem.
Find the source of the moisture first.
Repair a Loose Cabinet Handle
Kitchen and bathroom cabinet handles receive frequent use, so their screws can loosen over time.
Tightening the mounting screws is usually straightforward.
If the screw keeps spinning without gripping, the surrounding material may be damaged.
Do not keep turning the screwdriver harder.
Depending on the cabinet construction, a different fixing or repair method may be required.
When replacing handles, measure the distance between existing holes before purchasing new hardware.
This allows you to choose a replacement that fits without creating unnecessary holes.


Repair a Drawer That Keeps Sticking
A drawer that does not open smoothly may have something caught in its mechanism, loose screws, damaged runners, or an alignment problem.
Empty the drawer first.
Check the runners for dirt or objects that may be interfering with movement.
Inspect the screws and tighten any that have become loose.
If the drawer works when empty but sticks when full, it may simply be overloaded.
For damaged runners, replacement may be possible. Measure the existing runner carefully before buying a new one because sizes and designs vary.
Secure a Loose Shelf
A shelf pulling away from the wall should be dealt with promptly.
Remove the shelf and inspect the fixing points.
The original wall plugs may have failed, or the fixings may not be appropriate for the wall material.
Identify whether you are dealing with solid masonry, plasterboard, timber, or another surface.
Then select fixings designed for that material and suitable for the shelf’s expected load.
Do not assume that a larger screw automatically makes a stronger repair.
The entire fixing system must work with the wall construction.


Fix a Drafty Door
A draft around an exterior door may be caused by worn weatherstripping, gaps around the frame, or poor adjustment.
Inspect the seal around the door.
If it is damaged, compressed, or missing, a suitable replacement seal may help.
Check the bottom of the door as well.
A correctly fitted door sweep or bottom seal can reduce unwanted airflow.
Do not block intentional ventilation openings in a property.
If the draft comes from significant gaps around the frame, investigate the cause instead of simply adding more sealant.
Improve a Drafty Window
Start by checking whether the window closes correctly.
Inspect visible seals and gaps around the frame.
A worn seal may be replaceable, while a damaged frame or failed sealed glazing unit may require specialist attention.
For some windows, temporary insulating measures can reduce drafts.
However, if you notice condensation trapped between panes of double glazing, the sealed unit may have failed. This is generally a replacement issue rather than something a tube of sealant can solve.


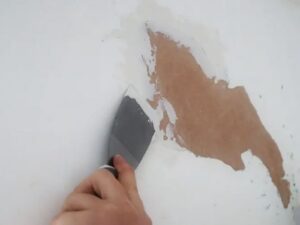
Repair Peeling Paint
Peeling paint is often a sign that something happened beneath the surface.
Poor preparation, moisture, incompatible coatings, or age can all contribute.
Do not simply paint over loose paint.
Carefully remove unstable material and prepare the surface.
If moisture is present, find and address the source before repainting.
Once the surface is dry and stable, use a suitable primer and paint system.
If the paint repeatedly peels from the same area, treat that as useful information. The underlying cause has probably not been solved.
Fix Minor Tile Damage
A single cracked ceramic tile does not always mean the entire floor or wall needs replacement.
If the surrounding surface is stable and a matching replacement tile is available, replacing the damaged tile may be possible.
Removing a tile requires care because you can easily damage nearby tiles or the surface beneath it.
Wear eye protection and work carefully.
Before replacing the tile, consider why it cracked.
An impact may have caused it, but movement beneath the tile or an unstable surface can cause the same problem again.


Fix a Loose Curtain Rail
A curtain rail that pulls away from the wall may have been installed with unsuitable fixings or may simply be carrying more weight than the original installation can support.
Remove the rail and inspect the mounting points.
If the wall material around the fixing has crumbled, inserting the same type of screw into the same damaged hole is unlikely to provide a lasting solution.
Choose a suitable fixing for the wall type.
For heavy curtains, make sure the brackets are securely attached to appropriate supporting material.
Repair a Wobbly Chair
Do not ignore furniture that feels unstable.
Turn the chair over and inspect its joints, screws, bolts, and connecting pieces.
Tighten loose hardware where appropriate.
If a wooden joint has separated, a suitable wood adhesive may help depending on the construction and condition of the joint.
Do not use the chair normally until you are confident that it is stable.
A small wobble can become a fall hazard.


Repair Small Scratches on Wooden Furniture
Minor scratches do not always justify replacing furniture.
Clean the surface first and determine whether the scratch affects only the finish or has reached the wood underneath.
For light surface damage, a suitable furniture repair product may reduce its appearance.
Test any product on an inconspicuous area before applying it to the visible surface.
Be cautious with sanding, particularly on valuable, veneered, or antique furniture.
Aggressive sanding can remove more material than intended and create a bigger problem.
Improve a Noisy Floor
A squeaky floor can be frustrating, but diagnosing the location is more important than immediately driving screws into it.
There may be pipes, cables, or other services beneath the flooring.
Identify the construction and source of the movement before drilling or fastening anything.
If you cannot confidently determine what lies beneath the floor, do not guess.
A professional may be able to identify the cause and recommend a suitable repair without creating additional damage.


Deal With Small Mould Problems Carefully
Mould is not simply a cleaning issue.
Moisture, condensation, plumbing leaks, poor ventilation, and water entering from outside can all contribute to its growth.
For a small surface area, follow appropriate cleaning and safety guidance for the material and cleaning product involved.
More importantly, look for the source of moisture.
Improving ventilation may help with condensation. Repairing a leak can prevent further moisture.
If mould is extensive, repeatedly returns, appears in hidden areas, or is associated with significant water damage, professional assessment may be appropriate.
Do not simply paint over mould.
Repair a Loose Fence Panel
Outdoor timber can become loose as it ages and is exposed to weather.
Inspect the panel, rails, posts, and fixings.
If a fixing has simply failed and the surrounding wood remains sound, replacing it may solve the problem.
If the timber has rotted, adding another screw will not restore its strength.
Inspect the supporting post as well.
A new panel attached to a deteriorated post may remain unstable.
Fix a Crooked Picture Frame
A crooked picture can sometimes be fixed with nothing more than better positioning.
For heavier frames, however, the wall fixing needs to be appropriate for both the wall material and the weight.
Measure before drilling.
Do not rely on a tiny hook for a heavy frame simply because it appears convenient.
Extra care is sensible when hanging heavy objects above beds, sofas, or areas where people spend time.


Know When a DIY Repair Is Unsafe
DIY is useful, but it has limits.
Some household problems require specialist knowledge, equipment, or certification.
Professional assistance is generally the safer choice for work involving:
- Gas pipes or gas appliances
- Major electrical faults
- Significant structural movement
- Load-bearing walls
- Serious plumbing leaks
- Major roof work
- Extensive water damage
- Suspected hazardous building materials
- Work at dangerous heights
If you are unsure whether a repair is safe, stop before taking anything apart.
Saving money is not worth creating a larger repair bill or putting someone at risk.
Common DIY Mistakes to Avoid
Repairing the Symptom Instead of the Cause
Painting over dampness or repeatedly tightening a failed fixing rarely solves the underlying problem.
Using the Wrong Materials
A product designed for indoor decoration may not be suitable outdoors or in a wet area.
Check the manufacturer’s instructions.
Using Too Much Force
Overtightening can damage screws, plastic fittings, handles, hinges, and plumbing connections.
Skipping Preparation
Cleaning, measuring, drying, and preparing surfaces can make the difference between a repair that lasts and one that fails quickly.
Starting Too Many Projects
It is easy to get excited after completing one successful repair and begin five more.
Finish one job properly before moving on.
Forgetting to Test the Repair
After repairing a tap, check for leaks.
After fixing a door, open and close it several times.
After securing a shelf, check its stability before placing normal items on it.
Testing is part of the repair, not an optional extra.


A Simple DIY Repair Method for Beginners
When something goes wrong at home, follow a consistent process.
Step 1: Describe the Problem
Be specific.
Instead of saying “the sink is broken,” determine whether it is leaking, draining slowly, making noise, or failing to supply water.
Step 2: Look for the Cause
Inspect the surrounding area and consider what changed.
Step 3: Check for Safety Risks
Think about electricity, gas, water, structural movement, hidden pipes, and cables.
Step 4: Find the Correct Information
Use reliable instructions for the specific product or fixture.
Step 5: Gather the Right Tools
Do not improvise with unsuitable equipment.
Step 6: Protect the Area
Keep tools, water, dust, and debris under control.
Step 7: Make the Repair Carefully
Work slowly and avoid unnecessary force.
Step 8: Test Everything
Check the result before considering the job complete.
Step 9: Watch for Recurring Problems
If the same issue returns, look for an underlying cause rather than repeating the same temporary repair.
How to Save Money With DIY Repairs
DIY can reduce costs, but the biggest savings often come from preventing small problems from becoming larger ones.
Deal with minor leaks early.
Replace worn seals before water reaches surrounding materials.
Tighten loose hardware before it causes further damage.
Clean gutters and suitable drainage areas regularly.
Inspect outdoor wood before rot spreads.
Keep an eye on areas where moisture commonly appears.
A few minutes of maintenance can sometimes prevent a much more involved repair.
Final Thoughts
Simple DIY home repairs can make everyday life easier and help you maintain your property without immediately calling a professional for every minor issue.
A loose handle, small wall hole, squeaky hinge, damaged seal, sticking door, slow drain, or worn cabinet fitting may be manageable with basic tools and careful preparation.
The most valuable DIY skill, however, is knowing your limits.
Do not treat gas work, major electrical problems, structural concerns, serious leaks, hazardous materials, or dangerous heights as ordinary weekend projects.
Start with simple repairs.
Understand the cause before fixing the symptom.
Use appropriate tools and materials.
Take your time.
And always put safety ahead of saving a few pounds.
A successful DIY repair is not just one that looks good when you finish. It is one that solves the actual problem, lasts reasonably well, and does not create a new problem in the process.
Frequently Asked Questions
What are the easiest DIY home repairs for beginners?
Good starting points include tightening loose handles, filling small wall holes, replacing suitable cabinet hardware, lubricating squeaky hinges, repairing minor sealant problems, and adjusting simple doors.
What tools should I have for basic home repairs?
A screwdriver set, adjustable wrench, pliers, hammer, tape measure, spirit level, utility knife, drill, suitable drill bits, and basic safety equipment are useful for many everyday jobs.
Can I fix a dripping tap myself?
Some tap repairs are suitable for confident DIYers, particularly when the water supply can be safely isolated and the faulty component is easy to identify. If the source of the leak is unclear or the repair does not work, professional help may be appropriate.
How can I repair a small hole in a wall?
Clean away loose material, apply suitable filler, allow it to dry, sand it carefully, and finish the area with primer or paint where necessary.
Should I paint over peeling paint?
No. Remove unstable paint and investigate why it is peeling first. Moisture or poor surface preparation may be responsible.
How do I fix a slow drain?
Start by removing visible debris and using a suitable plunger. If several drains are affected or water repeatedly backs up, the problem may require professional attention.
Why does my door keep sticking?
Possible causes include loose hinges, humidity-related movement, frame alignment, or changes in the door itself. Identify where the door is rubbing before deciding how to repair it.
How do I know whether a crack in my wall is serious?
Small surface cracks can occur for several ordinary reasons, but widening, recurring, or unusually large cracks deserve closer attention, particularly if they occur alongside sticking doors, windows, or other signs of movement.
Is DIY always cheaper than hiring a professional?
No. DIY can save money on suitable jobs, but an incorrect repair can cause additional damage. Choose DIY projects that match your skill level and leave specialised or hazardous work to qualified professionals.
What should I do if a DIY repair does not work?
Stop repeating the same repair and reassess the cause. If you cannot identify the underlying problem or the repair involves significant safety risks, seek professional advice rather than continuing to experiment.
What is the most important DIY safety rule?
Know your limits. If a job involves significant electrical, gas, structural, water, height, or hazardous-material risks, getting appropriate professional help is usually safer than attempting the repair yourself.