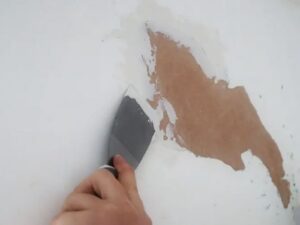
Owning a home is rewarding, but it also comes with ongoing maintenance and occasional repairs. From loose cabinet handles to dripping faucets, small problems are part of everyday homeownership. Ignoring them often allows minor issues to become larger and more expensive over time.
The good news is that many common household repairs don’t require years of experience or a garage full of specialized tools. Learning a few basic DIY repair skills can help you handle routine maintenance, protect your home’s condition, and feel more confident when something needs attention.
DIY repairs are not about replacing professional tradespeople. Instead, they help homeowners take care of simple maintenance tasks safely while recognizing when a repair is beyond their skill level. Knowing the difference is just as important as knowing how to use a screwdriver.
This guide introduces practical repair skills that every homeowner should understand, along with important safety advice and realistic expectations for beginners.
Safety Note: Always read the manufacturer’s instructions before using tools or repair products. If a project involves electricity, gas lines, structural components, roofing, or major plumbing, stop and consult a qualified professional. Local building codes and safety regulations may also apply.
Why Learning Basic Repair Skills Matters
Every home experiences normal wear and tear. Doors become loose, caulk wears out, paint chips, and fixtures need occasional adjustment. Addressing these issues early often prevents larger repairs later.
Learning basic repair skills can help you:
- Respond quickly to small maintenance issues.
- Reduce the likelihood of preventable damage.
- Better understand how different parts of your home work.
- Communicate more effectively with contractors when professional repairs are needed.
- Maintain your home’s appearance and functionality.
The goal isn’t to become an expert builder overnight. It’s to develop practical skills that make routine home maintenance less intimidating.
The HOME FIX Method
When deciding whether to tackle a repair yourself, use the HOME FIX Method as a simple guide.
H — Handle Small Problems Early
Small issues often become larger if left unattended. A loose hinge today could become a damaged door frame later.
O — Observe Before Repairing
Take time to understand the problem before reaching for tools. Sometimes the visible issue is only a symptom of something else.
M — Maintain Before Replacing
Many household items can be cleaned, adjusted, tightened, or repaired instead of replaced.
E — Equip Yourself Properly
Using the correct tool makes repairs safer, easier, and more accurate.
F — Follow Safety Guidelines
Wear appropriate safety equipment and avoid repairs that exceed your experience.
I — Inspect Your Work
After completing a repair, check that everything functions correctly and safely.
X — eXercise Patience
Rushing often leads to mistakes. Careful, steady work usually produces better results.
Build a Basic DIY Toolbox
Before attempting repairs, assemble a small collection of quality tools. You don’t need an expensive workshop to handle everyday maintenance.
A beginner’s toolbox should include:
- Claw hammer
- Tape measure
- Adjustable wrench
- Screwdriver set (flat-head and Phillips)
- Utility knife
- Needle-nose pliers
- Slip-joint pliers
- Level
- Flashlight or headlamp
- Stud finder
- Putty knife
- Caulking gun
- Safety glasses
- Work gloves
- Step ladder
Choose durable tools from reputable manufacturers whenever possible. Well-made tools often last for many years when properly maintained.
1. Tightening Loose Hardware
One of the simplest repairs is also one of the most common.
Cabinet handles, drawer pulls, towel bars, door knobs, and furniture screws naturally loosen with repeated use.
How to Handle It
Inspect the hardware periodically.
If screws have loosened:
- Tighten them carefully using the correct screwdriver.
- Avoid overtightening, which can damage wood or strip screw holes.
- Replace worn screws if necessary.
Why It Matters
Loose hardware places extra stress on surrounding materials. Tightening it early helps prevent larger repairs.
2. Repairing Small Holes in Drywall
Minor wall damage is common after moving furniture, hanging pictures, or everyday household activities.
Small nail holes and dents are usually straightforward to repair.
Basic Steps
For minor damage:
- Clean away loose debris.
- Apply an appropriate wall repair compound according to the product instructions.
- Allow it to dry completely.
- Sand lightly until smooth.
- Prime and repaint if needed.
Beginner Tip
Practice on a hidden area if you’ve never used wall repair products before. Learning how much compound to apply takes a little experience.
3. Replacing Worn Caulk Around Sinks and Bathtubs
Caulk helps prevent water from reaching areas behind sinks, showers, and bathtubs.
Over time it may crack, shrink, discolor, or separate from the surface.
Why It Matters
Damaged caulk can allow moisture into walls or cabinets, increasing the risk of water damage over time.
General Repair Process
- Remove damaged caulk carefully.
- Clean and dry the surface thoroughly.
- Apply fresh caulk according to the manufacturer’s instructions.
- Allow the recommended curing time before exposing the area to water.
Taking your time usually produces cleaner, more durable results.
4. Fixing a Running Toilet
A toilet that continues running after flushing often wastes a surprising amount of water.
Fortunately, the cause is frequently a worn or misaligned component inside the tank.
Before You Begin
Turn off the water supply if necessary and remove the tank lid carefully.
Inspect:
- The flapper
- Fill valve
- Float
- Chain
Sometimes a simple adjustment restores normal operation.
If internal parts are damaged or heavily worn, replacement components designed for your toilet model may solve the problem.
When to Call a Professional
If water is leaking around the base of the toilet or you suspect plumbing damage beyond the tank components, professional assistance is advisable.
5. Stopping a Dripping Faucet
A dripping faucet can be annoying, but it may also increase water usage over time.
The exact repair depends on the faucet design.
Common causes include:
- Worn washers
- Damaged O-rings
- Cartridge wear
- Mineral buildup
General Advice
Before beginning:
- Shut off the water supply.
- Identify the faucet type.
- Follow the manufacturer’s repair guidance where available.
Taking photos during disassembly can make reassembly much easier.
A Practical Lesson Every Homeowner Learns
Many experienced homeowners eventually realize that successful DIY isn’t about knowing every repair.
It’s about knowing three things:
- How to identify the problem.
- Whether it’s safe to repair yourself.
- When professional experience is the better choice.
That mindset often saves more money than attempting every repair without preparation.
6. Unclogging a Slow-Draining Sink Without Harsh Chemicals
A bathroom or kitchen sink that drains slowly is one of the most common household problems. Hair, soap residue, grease, and food particles can gradually build up inside the drain, reducing water flow.
Before reaching for a chemical drain cleaner, try safer methods that are less likely to damage your plumbing.
Safe Steps to Try
- Remove any visible debris from the drain opening.
- Flush the drain with hot water if appropriate for your plumbing.
- Use a sink plunger designed for smaller drains.
- Clean the sink stopper, which often collects hair and soap residue.
- Use a manual drain snake according to the manufacturer’s instructions.
Avoid This Common Mistake
Repeated use of harsh chemical drain cleaners can damage certain types of pipes over time and may create safety hazards if multiple products are mixed.
When to Call a Professional
If several drains in your home become slow at the same time or water backs up into other fixtures, the problem may be deeper within the plumbing system and should be inspected by a qualified plumber.
7. Fixing Squeaky Doors and Loose Hinges
A squeaky door is rarely a serious problem, but it can become annoying if left untreated.
Most squeaks develop because of friction between the hinge pin and the hinge itself.
Simple Repair
Inspect the hinges first.
If screws have loosened, tighten them carefully.
If the squeak continues:
- Clean dirt from the hinge.
- Apply a lubricant recommended for door hinges.
- Open and close the door several times to distribute the lubricant evenly.
Preventive Maintenance
Inspect frequently used doors every few months. Keeping hinges clean and secure can prevent future wear.
8. Replacing Weatherstripping Around Doors and Windows
Weatherstripping helps reduce drafts, improve indoor comfort, and support energy efficiency.
Over time it may crack, flatten, or separate from the frame.
Signs It Needs Replacement
- Drafts near doors or windows
- Higher heating or cooling costs
- Visible gaps
- Torn or brittle weatherstripping
Basic Replacement Steps
- Remove the old material.
- Clean the surface thoroughly.
- Measure carefully.
- Install replacement weatherstripping according to the manufacturer’s instructions.
A proper fit is more important than using excessive material.
9. Repairing a Door That Sticks
Doors may become difficult to open or close because of humidity, seasonal expansion, loose hinges, or frame movement.
Start With the Simplest Checks
Inspect:
- Loose hinge screws
- Dirt around the frame
- Objects blocking the door
- Areas where the door rubs against the frame
Sometimes tightening the hinges or making a minor adjustment restores smooth operation.
Don’t Rush Into Sanding
Removing material from the door should generally be considered only after confirming that the problem isn’t caused by loose hardware or seasonal moisture changes.
10. Resetting a Tripped Circuit Breaker Safely
Occasionally, a circuit breaker may trip because of an overloaded circuit or a temporary electrical fault.
Safe Procedure
Before resetting the breaker:
- Unplug devices connected to the affected circuit.
- Open the electrical panel carefully.
- Identify the breaker that has moved to the tripped position.
- Reset it according to the panel manufacturer’s instructions.
Important Safety Reminder
If the same breaker trips repeatedly, do not continue resetting it. Frequent tripping may indicate an electrical problem that requires inspection by a licensed electrician.
11. Touching Up Interior Paint
Paint naturally experiences wear over time, especially in busy areas such as hallways, stairways, and children’s rooms.
Small touch-ups help keep walls looking clean and well maintained.
Best Practices
- Clean the area first.
- Use matching paint whenever possible.
- Apply thin, even coats.
- Allow adequate drying time between coats if needed.
Helpful Tip
Label leftover paint cans with the room name and purchase date. This makes future touch-ups much easier.
12. Replacing HVAC or Air Filters
If your home has a heating or cooling system that uses replaceable air filters, changing them regularly is one of the simplest maintenance tasks you can perform.
A clean filter supports airflow and helps the system operate efficiently.
General Guidelines
Follow the manufacturer’s recommendations regarding:
- Filter size
- Installation direction
- Replacement intervals
The ideal schedule depends on factors such as indoor air quality, pets, and system usage.
Why It Matters
Neglecting air filter maintenance may reduce system performance and increase unnecessary strain on HVAC equipment.
13. Cleaning Gutters Safely
Gutters help direct rainwater away from your home’s roof, walls, and foundation.
When they become blocked with leaves or debris, water may overflow and cause damage.
Safety First
If you choose to clean gutters yourself:
- Use a stable ladder on level ground.
- Wear gloves.
- Avoid overreaching.
- Have another adult nearby whenever possible.
When Professional Help Is Safer
Consider hiring a professional if:
- Your home has multiple stories.
- Roof access is difficult.
- Gutters are heavily damaged.
- You are uncomfortable working at height.
14. Replacing Smoke Alarm Batteries
Smoke alarms are one of the most important safety devices in any home.
Replacing batteries and testing alarms regularly helps ensure they function when needed.
Good Practice
Follow the manufacturer’s recommendations for:
- Battery replacement
- Testing intervals
- Complete unit replacement
Never remove batteries without immediately installing new ones.
15. Inspecting Your Home Regularly
Perhaps the most valuable DIY skill isn’t a repair at all.
It’s learning to notice problems early.
Walk through your home several times each year and check for:
- Water stains
- Peeling paint
- Loose railings
- Cracked caulk
- Damaged weatherstripping
- Roof debris visible from the ground
- Foundation cracks
- Pest activity
Small observations often prevent larger repairs.
The Value of Preventive Maintenance
Many homeowners think repairs begin when something breaks.
In reality, the best repairs often happen before failure occurs.
For example:
- Tightening a loose hinge prevents damage to the door frame.
- Replacing cracked caulk helps keep water away from walls.
- Cleaning gutters supports proper drainage during heavy rain.
- Replacing worn weatherstripping helps maintain indoor comfort.
Preventive maintenance may not seem exciting, but it often reduces unexpected repair costs and helps your home stay in good condition.
Building Confidence One Repair at a Time
No homeowner learns every repair skill in a single weekend.
Confidence develops through experience.
Start with smaller projects that match your current skill level. As you become more familiar with your tools and your home’s systems, you’ll be better prepared to handle routine maintenance while recognizing when professional assistance is the safer choice.
Know Your Limits: DIY vs. Hiring a Professional
Learning DIY repair skills can save time and money, but one of the most valuable skills is knowing when to stop and seek professional help. Some repairs involve risks that go beyond cosmetic damage and may affect the safety of your home.
DIY Projects That Are Often Suitable for Beginners
If you have the right tools, follow product instructions carefully, and work patiently, many routine maintenance tasks are manageable for homeowners.
Examples include:
- Tightening loose cabinet handles and door hardware
- Replacing weatherstripping
- Touching up interior paint
- Repairing small drywall holes
- Replacing worn caulk around sinks or bathtubs
- Cleaning gutters safely on a single-story home
- Changing HVAC filters
- Replacing smoke alarm batteries
- Fixing a running toilet caused by worn tank components
- Unclogging a slow drain using non-chemical methods
Repairs Best Left to Qualified Professionals
Some jobs require specialized training, tools, or permits. Attempting these repairs without experience can increase the risk of injury or property damage.
Consider hiring a professional for:
- Electrical wiring or panel upgrades
- Gas line installation or repair
- Major plumbing work
- Roof repairs at height
- Foundation or structural repairs
- Large tree removal near structures
- HVAC installation or refrigerant work
- Mold remediation involving large affected areas
When in doubt, prioritize safety over saving money.
Create a Simple Home Maintenance Routine
Many repairs can be avoided with regular maintenance. Setting aside a little time each season can help you identify small issues before they become expensive problems.
Monthly
- Test smoke and carbon monoxide alarms.
- Check for leaking faucets or pipes.
- Inspect sinks and tubs for damaged caulk.
- Replace burned-out light bulbs.
- Look for signs of pests.
Every Three to Six Months
- Replace or inspect HVAC filters as recommended.
- Clean range hood and bathroom exhaust fans.
- Check weatherstripping around doors and windows.
- Inspect exterior faucets for leaks.
- Tighten loose cabinet hardware.
Twice a Year
- Clean gutters and downspouts.
- Inspect the roof from the ground for missing or damaged shingles.
- Check windows and doors for drafts.
- Trim vegetation away from the house.
- Inspect the foundation for visible cracks or drainage problems.
Once a Year
- Review your home’s exterior for peeling paint or damaged siding.
- Inspect decks, railings, and steps for signs of wear.
- Flush the water heater if recommended by the manufacturer.
- Check attic and basement areas for moisture, mold, or pest activity.
- Review emergency supplies and replace expired items.
Common DIY Repair Mistakes
Skipping the Instructions
Every product is different. Reading the manufacturer’s instructions before starting can help prevent avoidable mistakes.
Using the Wrong Tool
Improvising with the wrong tool can damage materials, make the repair more difficult, or increase the risk of injury.
Rushing Through the Job
Most mistakes happen when people hurry. Allow enough time to complete the repair carefully, including drying or curing times where required.
Ignoring Early Warning Signs
A small stain on the ceiling, a loose railing, or a dripping faucet may seem minor today but can become a larger repair if left unattended.
Buying the Cheapest Materials
Low-cost materials may be appropriate for some projects, but products used frequently—such as caulk, paint, or hardware—often provide better value when you choose reliable quality.
Forgetting Safety Equipment
Safety glasses, gloves, hearing protection, and sturdy footwear are inexpensive compared with the cost of an avoidable injury.
A Beginner’s Repair Checklist
Before starting any DIY repair, ask yourself these questions:
- Do I understand what is causing the problem?
- Do I have the correct tools?
- Have I read the product instructions?
- Is the repair within my skill level?
- Does this project involve electricity, gas, or structural components?
- Do I need to turn off the water or power before beginning?
- Do I have enough time to complete the repair without rushing?
If the answer to any safety-related question is “no,” pause and gather more information or contact a qualified professional.
Helpful Habits That Make DIY Easier
Experienced homeowners often rely on a few simple habits that make future repairs less stressful.
- Keep a small notebook or digital record of repairs and maintenance.
- Label leftover paint with the room name and purchase date.
- Store instruction manuals and warranty information in one place.
- Organize your toolbox so frequently used items are easy to find.
- Replace worn tools when they become unsafe or unreliable.
- Clean tools after each project to help extend their lifespan.
These habits save time and make it easier to maintain your home over the years.
Frequently Asked Questions
What DIY repair should every new homeowner learn first?
Learning how to tighten loose hardware, repair small wall holes, replace worn caulk, change HVAC filters, and safely shut off your home’s water supply are excellent starting points because these tasks are common and generally require only basic tools.
Can DIY repairs save money?
Handling routine maintenance yourself may reduce labor costs for simple repairs. However, mistakes on more complex projects can sometimes lead to additional expenses, so it’s important to work within your experience level.
How many tools do I need to get started?
A basic toolbox with a hammer, screwdriver set, adjustable wrench, pliers, utility knife, tape measure, level, flashlight, and safety gear is enough for many beginner-friendly repairs.
How do I know when a repair is beyond my abilities?
If a repair involves electrical systems, gas lines, structural elements, major plumbing, roofing, or you are unsure how to complete it safely, it’s generally best to consult a qualified professional.
How often should I inspect my home?
A quick walkthrough every month and a more detailed inspection each season can help you spot maintenance issues before they become costly repairs.
Final Thoughts
Every homeowner encounters repairs from time to time, but not every problem requires specialized knowledge or expensive tools. Learning a few essential DIY repair skills can help you maintain your home, respond to minor issues promptly, and better understand how your home functions.
The most successful DIY projects begin with careful planning, realistic expectations, and a commitment to safety. By starting with simple repairs, using the correct tools, and following product instructions, you can build confidence while protecting your home from unnecessary wear and damage.
Just as important, knowing when to step back and call a qualified professional is a skill in itself. Some repairs require technical expertise, permits, or specialized equipment, and choosing professional help in those situations protects both your home and your safety.
Home maintenance is an ongoing process rather than a one-time project. Small, consistent efforts—such as inspecting your home regularly, fixing minor problems early, and performing routine maintenance—can help preserve your home’s comfort, appearance, and long-term value.