DIY home repairs can save time, reduce maintenance costs, and give you more confidence when something goes wrong around the house. A loose door handle, small wall hole, dripping tap, damaged shelf, or sticking drawer may seem like a simple problem that anyone can fix.
Sometimes it is.
The trouble begins when a small repair is approached without finding the real cause, choosing the right materials, or considering what might be hidden behind a wall or floor. A five-minute repair can then turn into damaged furniture, a leaking pipe, a broken fitting, or a much larger job.
The good news is that most DIY mistakes are avoidable. You do not need years of professional experience to improve your results. You need a careful process, suitable tools, and the willingness to stop when a job becomes unsafe or too complicated.
This guide explains common DIY repair mistakes, why they happen, and practical ways to avoid them at home.


Why DIY Repairs Go Wrong
Most failed DIY repairs do not happen because someone lacks intelligence or effort.
They often happen because the repair starts too quickly.
A homeowner sees a loose screw and tightens it. Someone notices peeling paint and paints over it. A shelf feels unstable, so a larger screw is pushed into the same hole.
These actions may temporarily improve the appearance of the problem without fixing its cause.
Before starting any repair, take a few minutes to ask what happened, why it happened, and whether the problem has appeared before.
That short pause can prevent a surprising amount of wasted work.


Mistake 1: Fixing the Symptom Instead of the Cause
This is one of the most common DIY mistakes.
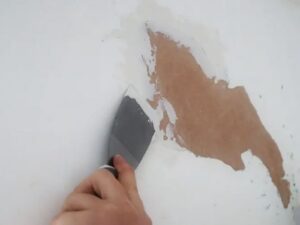
Imagine finding a damp patch on a wall. Painting the area may make it look better for a few weeks, but if water is still entering the wall, the damage can continue underneath the fresh paint.
The same principle applies to many household problems.
A dripping tap may have a worn internal component. A loose shelf may have unsuitable wall fixings. A sticking door may have an alignment problem rather than simply needing sanding.
How to Avoid It
Before repairing anything, ask:
- What caused this problem?
- Has it happened before?
- Is there moisture involved?
- Is something moving or under pressure?
- Could the problem be coming from somewhere else?
- Does the damage appear to be getting worse?
You do not need to diagnose everything perfectly. You simply need to avoid making assumptions too quickly.


Mistake 2: Using the Wrong Tool
A tool can look close enough for a particular job and still be completely unsuitable.
Using pliers on a nut instead of an appropriate wrench can damage the fastener. Using a screwdriver as a pry bar can bend or break it. Using a household knife instead of a proper utility knife can create unnecessary risk.
The correct tool is usually designed to apply force in a specific way.
A Better Approach
Before starting, identify the task and choose a tool designed for it.
If you are unsure, check the manufacturer’s instructions for the fixture, fitting, appliance, or tool.
It is better to spend a few minutes finding the correct equipment than to spend an hour repairing damage caused by an unsuitable tool.
Mistake 3: Using Too Much Force
Many DIY beginners believe that if something will not move, they simply need to push harder.
That approach can make things worse.
A stuck screw may be corroded or damaged. A plumbing fitting may have a fragile plastic component. A wooden joint may be glued or fastened in a way that requires a particular method of removal.
Excessive force can snap fasteners, crack fittings, strip screw heads, and damage surrounding materials.


What to Do Instead
Stop when normal pressure is not working.
Inspect the connection.
Check whether you are using the correct tool and direction.
Look for corrosion, hidden fasteners, locking mechanisms, or other reasons the part may be difficult to move.
Controlled force is usually more useful than brute force.
Mistake 4: Skipping Measurements
Measuring may feel unnecessary when a project looks simple.
It is not.
A shelf can be slightly too long for a wall. A curtain rail can be mounted off-centre. A replacement cabinet handle can have holes that do not match the existing ones.
A small measuring error can create a surprisingly large inconvenience.
Measure Twice Before You Cut or Drill
Use a reliable tape measure.
Write measurements down rather than trying to remember them.
For important installations, measure the available space and the item itself.
Check your marks with a spirit level where alignment matters.
If the measurement is critical, verify it a second time before cutting or drilling.


Mistake 5: Choosing the Wrong Wall Fixing
A screw is only as useful as the material holding it in place.
A fixing that works well in solid masonry may not be suitable for plasterboard. A lightweight picture and a heavy wall cabinet also require different levels of support.
One of the most common mistakes is assuming that all walls are the same.
They are not.
How to Avoid This Problem
Identify the wall construction before installing anything substantial.
Consider whether it is:
- Solid masonry
- Plasterboard or drywall
- Timber
- A stud wall
- Another type of construction
Then choose fixings designed for that material and suitable for the load.
If you are mounting a heavy item, do not rely on guesswork.


Mistake 6: Drilling Without Checking What Is Behind the Wall
This mistake deserves particular attention.
Walls can contain electrical cables, plumbing, structural components, and other hidden elements.
Drilling without considering what is behind the surface can create serious damage.
Before drilling, identify the wall construction and use suitable detection methods where necessary.
Follow local safety guidance and the instructions for any detection equipment you use.
If you cannot confidently determine what is behind the wall, do not guess.
A picture can be moved to another location. A damaged pipe or electrical cable can create a much bigger problem.
Mistake 7: Painting Over Moisture
Peeling or bubbling paint is often treated as a decorating problem.
Sometimes it is not.
Moisture can enter walls through plumbing leaks, damaged exterior surfaces, poor ventilation, condensation, or other sources.
If you simply paint over the affected area, the new coating may peel again.
A Better Repair Process
First identify whether moisture is present.
Then investigate the likely source.
Allow affected materials to dry appropriately.
Repair the moisture problem before preparing and repainting the surface.
If water damage is extensive or the source cannot be identified, professional assessment may be appropriate.


Mistake 8: Applying New Sealant Over Old Sealant
Old silicone around a bath, shower, sink, or worktop can crack, separate, or become damaged.
A common shortcut is to apply new sealant directly over the old layer.
This may look neat temporarily, but the new material may not bond properly.
Do It Properly
Remove the old sealant as carefully as possible.
Clean the surface.
Make sure it is dry before applying new sealant.
Use a product suitable for the location and follow the manufacturer’s curing instructions.
If there is already water damage beneath the sealed area, repair the underlying problem rather than relying on fresh sealant.


Mistake 9: Ignoring Preparation
Preparation is one of the least exciting parts of DIY work.
It is also one of the most important.
If you are painting, the surface may need cleaning, sanding, filling, and priming.
If you are repairing a wall, loose material may need to be removed before filler is applied.
If you are installing hardware, accurate measurements and marking are necessary.
Skipping preparation often creates a repair that looks acceptable initially but fails sooner than expected.
Take the time to prepare the surface before applying the final material.
Mistake 10: Using Too Much Filler
Wall filler is useful for small holes and surface imperfections.
The mistake is applying a huge amount and assuming it will automatically produce a smooth finish.
Large amounts of filler can shrink, crack, or require substantial sanding.
Apply suitable amounts in stages when necessary.
Allow each layer to dry according to the product instructions.
Sand carefully rather than aggressively.


Mistake 11: Ignoring Drying and Curing Times
DIY materials often need time to dry or cure.
Paint, filler, adhesive, sealant, grout, and other products may appear dry on the surface before they are ready for normal use.
Touching, painting over, loading, or exposing them to water too early can interfere with the finished result.
Always check the manufacturer’s instructions.
Do not assume that “dry to touch” means “fully cured.”
Patience is often part of the repair.
Mistake 12: Rushing a Plumbing Repair
Plumbing problems can quickly become expensive if handled carelessly.
One common mistake is dismantling a fitting before identifying where the water supply can be isolated.
Another is overtightening plastic fittings.
Before working on accessible plumbing, understand how to shut off the relevant water supply and release pressure where appropriate.
Place a container or towels beneath the connection.
Make small adjustments and check for leaks.
If the leak is coming from an inaccessible location, continues after a basic repair, or involves significant water flow, professional help may be the safer option.


Mistake 13: Treating Every Electrical Problem as a DIY Job
Basic household maintenance is very different from working on electrical systems.
Replacing a battery in a device is one thing. Opening electrical equipment or modifying wiring is another.
Electrical work can create risks of electric shock, fire, equipment damage, and other hazards.
If a repair involves wiring, circuits, electrical panels, or other work that requires specialist knowledge, use an appropriately qualified professional and follow applicable local requirements.
Never work on electrical equipment simply because the task appears small.
Mistake 14: Using Dull Blades
A dull utility knife or cutting tool can be more difficult to control than a sharp, suitable blade.
People often compensate for dullness by applying extra pressure.
That increases the chance of slipping.
Use an appropriate sharp blade.
Keep your hands out of the cutting path.
Cut away from your body.
Retract or cover the blade immediately after use.
Store replacement blades safely.


Mistake 15: Forgetting Protective Equipment
Safety glasses may seem unnecessary when drilling one small hole.
That assumption can be risky.
Small fragments, dust, and debris can travel unexpectedly.
Wear appropriate eye protection when drilling, sanding, hammering, cutting, or performing tasks where particles may become airborne.
Depending on the job, other protection may also be appropriate.
The right safety equipment should match the hazard rather than being selected simply because it is convenient.
Mistake 16: Working in a Cluttered Area
A messy workspace creates avoidable problems.
Tools on the floor become trip hazards.
Loose cables can catch your feet.
Water near electrical equipment creates additional danger.
Sharp objects can become difficult to locate.
Before beginning a repair, clear enough space to work comfortably.
Keep tools within reach but away from walkways.
Clean spills immediately.
If you are working at height, keep the area below clear of people and pets.


Mistake 17: Trying to Repair Everything at Once
DIY projects can multiply quickly.
You start by tightening a cabinet handle and then notice a loose shelf, chipped paint, squeaky door, and damaged skirting board.
Suddenly the whole house becomes a construction site.
This can make mistakes more likely.
Finish one repair properly before starting another.
Make a simple list of problems and prioritise them based on safety, urgency, and difficulty.
A leaking pipe should generally receive attention before a cosmetic scratch on a table.
Mistake 18: Buying Materials Before Understanding the Job
Buying supplies too early can waste money.
You may purchase the wrong paint, incorrect wall plugs, unsuitable sealant, or replacement hardware that does not fit.
Inspect the problem first.
Measure the area.
Identify the material.
Then purchase what you actually need.
When replacing a small component, taking the old part with you to a hardware shop can sometimes make identification easier.


Mistake 19: Not Testing the Repair
A repair is not finished simply because the new part has been installed.
Test it.
After repairing a door handle, open and close the door several times.
After fixing a shelf, check its stability before loading it normally.
After repairing plumbing, run water slowly and inspect the connections.
After replacing a seal, check the area carefully for leaks.
Testing helps you discover problems while they are still easy to correct.
Mistake 20: Repeating a Temporary Fix
If the same problem returns repeatedly, stop repeating the same repair.
A cabinet door that becomes loose every week may have damaged mounting material.
A wall crack that returns after filling may be responding to movement.
A tap that continues leaking after replacing a component may have another underlying problem.
Recurring faults are useful clues.
Treat them as information rather than simply another opportunity to apply the same temporary fix.


Mistake 21: Ignoring the Condition of Your Tools
Tools also need maintenance.
A cracked hammer handle, damaged drill cable, worn blade, or loose screwdriver handle should not be ignored.
Before starting a project, quickly inspect the tools you intend to use.
Check for visible damage.
Make sure guards are in place where required.
Confirm that power tools operate normally before beginning the main task.
If a tool is damaged, repair or replace it appropriately rather than taking a risk.
Mistake 22: Forgetting About Hidden Structural Problems
Some household problems look cosmetic but may indicate something deeper.
A large or repeatedly returning crack, sagging surface, significant floor movement, or serious deterioration around a supporting structure should not automatically be treated as a simple DIY repair.
Do not cover a potentially serious structural issue with filler, paint, trim, or another cosmetic material.
If you are concerned about structural movement, get an appropriate professional assessment.


Mistake 23: Using the Wrong Product for the Environment
Not every adhesive, paint, sealant, filler, or fixing is suitable for every location.
A product designed for a dry indoor room may not perform well outdoors.
A decorative sealant may not be suitable for a constantly wet area.
A fixing designed for lightweight objects may not support a heavy cabinet.
Read the product label before buying.
Look for information about surfaces, temperatures, moisture exposure, weight limits, and intended applications.
Mistake 24: Removing Safety Guards From Power Tools
Power-tool guards exist for a reason.
Do not remove, disable, or bypass them simply because the tool appears easier to use without them.
If a guard is damaged or preventing normal operation, stop using the equipment and follow the manufacturer’s instructions for repair or replacement.
Never modify safety features to make a tool perform a job it was not designed to perform.
Mistake 25: Not Knowing When to Call a Professional
Perhaps the biggest DIY mistake is believing that every household problem should be solved personally.
Some work carries risks that are not appropriate for a beginner.
Professional assistance may be appropriate for major electrical work, gas systems, significant structural problems, serious leaks, complex roofing, dangerous work at height, and potentially hazardous materials.
There is no failure in calling someone with the right training.
Good DIY is about solving appropriate problems safely, not proving that you can do everything yourself.


A Better DIY Repair Process
If you want to make fewer mistakes, use the same process for every project.
Step 1: Define the Problem
Describe exactly what is wrong.
Instead of saying, “The bathroom is broken,” identify whether the tap is leaking, the drain is blocked, the seal is damaged, or the toilet is running.
Step 2: Find the Likely Cause
Look beyond the visible symptom.
Step 3: Consider Safety
Ask whether water, electricity, gas, height, structural movement, sharp materials, or hidden services are involved.
Step 4: Gather the Correct Tools
Do not begin until you have what the job actually requires.
Step 5: Prepare the Area
Protect floors and nearby surfaces where necessary.
Keep children and pets away.
Ensure adequate lighting and ventilation.
Step 6: Make the Repair Slowly
Follow the relevant instructions and avoid unnecessary force.
Step 7: Test the Result
Check that the repair works before considering the job finished.
Step 8: Monitor the Area
If the same problem returns, investigate further instead of repeatedly applying the same temporary fix.


How to Make DIY Repairs More Affordable
Avoiding mistakes can save more money than simply buying inexpensive materials.
Measure before purchasing.
Buy the correct product rather than the cheapest product that looks similar.
Take care of tools so they last longer.
Repair small problems before they become major ones.
Keep records of repairs if you live in the property for a long time. Notes about when a leak appeared, when a fitting was replaced, or what material was used can be helpful later.
Most importantly, avoid starting a project that you cannot safely finish.
An unfinished repair can cost more than hiring help in the first place.
Final Thoughts
DIY home repairs can be rewarding, practical, and useful, but good results depend on more than having a toolbox.
The most common mistakes usually come from rushing, guessing, using the wrong materials, applying too much force, skipping preparation, or failing to understand the cause of a problem.
Take a step back before reaching for your tools.
Inspect the problem.
Measure carefully.
Choose suitable materials.
Protect yourself and your home.
Follow instructions.
Test the repair when you are finished.
And know when professional help is the better option.
A small amount of patience can make a major difference. The goal of DIY is not simply to complete a repair as quickly as possible. It is to solve the actual problem safely, avoid unnecessary damage, and leave your home in better condition than you found it.
Frequently Asked Questions
What is the most common DIY repair mistake?
One of the most common mistakes is fixing the visible symptom without finding the underlying cause. This can result in the same problem returning repeatedly.
Why should I measure twice before a DIY project?
Accurate measurements help prevent mistakes when cutting materials, installing shelves, fitting hardware, mounting curtain rails, or working around limited spaces.
Can I use any screw for a wall repair?
No. Screws and wall fixings should be selected according to the wall material and the expected load. A fixing suitable for masonry may not work correctly in plasterboard.
Why should I avoid using too much force?
Excessive force can damage fasteners, fittings, tools, pipes, furniture, and surrounding materials. If something does not move normally, investigate the reason before applying more pressure.
Is painting over peeling paint a good repair?
Usually not. Peeling paint may be caused by moisture, poor preparation, incompatible coatings, or another underlying issue. The cause should be investigated before repainting.
How can I avoid damaging pipes or cables when drilling?
Identify the wall construction and consider what services may be hidden behind the surface. Use suitable detection methods where necessary and follow local safety guidance.
What should I do if my DIY repair keeps failing?
Stop repeating the same temporary fix. Look for an underlying cause, review the materials and method you used, and consider professional assistance if the cause is unclear or the repair involves significant risk.
When should I hire a professional for a home repair?
Professional help is appropriate for many major electrical, gas, structural, serious plumbing, roofing, hazardous-material, and dangerous-height jobs. If you cannot confidently complete a repair safely, it is sensible to get appropriate assistance.
How can beginners become better at DIY?
Start with small, low-risk projects. Learn how common tools work, measure carefully, follow product instructions, and treat each repair as an opportunity to understand the cause rather than simply covering the symptom.
Can DIY repairs really save money?
They can for suitable tasks, especially when you handle small maintenance problems before they become larger. However, an incorrect repair can increase costs, so savings should never come at the expense of safety or proper workmanship.