Small problems around the house have a way of becoming annoying at exactly the wrong time. A loose cabinet handle, dripping tap, sticking door, damaged wall, or clogged drain may seem too minor to call someone about, yet leaving it alone can sometimes turn a simple repair into a bigger job.
The good news is that many everyday home problems can be handled with basic tools, a little patience, and the right approach.
DIY home repairs are not about fixing everything yourself. They are about recognising which jobs are straightforward, knowing how to approach them safely, and understanding when a problem needs professional attention.
If you are new to DIY, start with simple repairs that do not involve significant electrical, gas, structural, or safety risks. Work slowly, use the correct materials, and avoid rushing just because a repair looks easy.


Start With the Right DIY Tools
You do not need a workshop full of equipment to handle basic household repairs.
A useful starter toolkit can include a screwdriver set, adjustable wrench, claw hammer, tape measure, utility knife, pliers, spirit level, drill with suitable bits, and a selection of basic wall fixings.
Safety equipment matters too.
Keep work gloves and eye protection available for jobs that create dust, splinters, or small debris.
Before beginning a repair, identify the material you are working with. A screw suitable for wood may not be appropriate for masonry, and a wall fixing designed for plasterboard may not hold safely in solid masonry.
Using the right fixing is often more important than using a stronger drill.
A Simple Rule Before Starting Any Repair
Before touching anything, ask three questions:
What caused the problem?
Can I repair it safely?
What could happen if I make it worse?
The third question is particularly important.
A loose picture frame is very different from a leaking pipe behind a wall.
If the repair involves electricity, gas, structural components, major water leaks, or potentially hazardous materials, professional help may be the safer choice.


Fixing a Dripping Tap
A dripping tap is one of those problems that seems small but can become increasingly irritating.
Sometimes the cause is a worn washer, cartridge, seal, or other internal component.
Before doing anything, turn off the water supply to the tap or the appropriate local shut-off valve.
Open the tap briefly to release pressure.
Then determine what type of tap you have and identify the appropriate replacement part.
Replace the Worn Component
The exact process varies considerably between tap designs.
In some taps, the worn part is a washer. Others use cartridges or ceramic mechanisms.
Do not force components apart if they are stuck.
Take photographs as you disassemble the tap so you can remember the order of the parts.
Once the worn component is replaced, reassemble everything carefully and turn the water supply back on gradually.
Check for leaks before considering the job finished.
If the leak continues or you cannot identify the source, stop rather than repeatedly tightening parts.
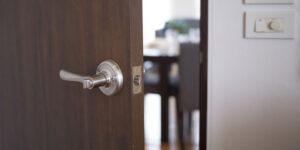
Fixing a Loose Door Handle
A loose door handle is often one of the easiest household repairs.
First, inspect the visible screws.
If they are loose, tighten them with the correct screwdriver.
Do not overtighten them. Excessive force can damage the screw head or surrounding material.
If the handle continues to loosen, inspect the mounting hardware.
The problem may be a worn screw hole, damaged fitting, or loose internal mechanism.
A replacement screw or suitable fixing may solve the problem.


Repairing a Sticking Door
A door that suddenly becomes difficult to close does not necessarily need to be replaced.
Start by opening and closing it slowly.
Notice where the door contacts the frame.
Check the hinges and screws.
Loose hinges can cause the door to move out of alignment.
Changes in humidity can also affect some wooden doors.
If the problem is minor, tightening the hinges may be enough.
Avoid immediately cutting or sanding the door until you understand why it is sticking.
If the frame has shifted or there is significant movement, the cause may require more careful investigation.
Fixing a Squeaky Door Hinge
A squeaky hinge is usually caused by friction between moving metal parts.
Apply a small amount of suitable lubricant to the hinge mechanism.
Open and close the door several times so the lubricant can work into the moving area.
Wipe away excess material.
If the squeak returns quickly, inspect the hinge for looseness, damage, or corrosion rather than simply adding more lubricant repeatedly.


Repairing Small Holes in Walls
Small holes from nails, screws, or wall hooks are common.
For minor surface holes, a suitable wall filler can provide a simple repair.
Remove loose material around the hole.
Apply the filler according to the product instructions.
Allow it to dry.
Sand the area carefully until it is reasonably smooth.
Then prime or paint the repaired area as needed.
Do not simply cover large or unusual cracks with filler.
A crack that is widening, returning repeatedly, or accompanied by other structural signs deserves further investigation.
Fixing Small Wall Cracks
Not every crack is a serious structural problem.
Some small surface cracks can occur as materials settle or change with temperature and humidity.
However, pay attention to the pattern.
A crack that becomes noticeably larger, runs through several materials, appears around structural openings, or is accompanied by sticking doors and windows should not simply be painted over.
Document the crack with photographs and monitor changes.
If you are concerned about structural movement, consult a qualified professional.


Fixing a Running Toilet
A toilet that continues running after flushing can waste water and usually indicates that something inside the cistern is not operating correctly.
Remove the cistern lid carefully if your toilet design allows it.
Observe what happens when you flush.
The issue may involve the fill valve, flush mechanism, float, or seal.
Check whether the float is stuck and whether the water level is unusually high.
Do not force plastic components.
Replacement mechanisms are available for many common toilet designs, but the correct part depends on the system installed.
If you are uncertain about the mechanism or cannot stop the water supply, consider getting professional help.
Fixing a Slow Bathroom Drain
A slow drain can result from hair, soap residue, grease, or other buildup.
Start with a simple mechanical approach.
Remove the drain cover if appropriate and clean away visible debris.
A suitable plunger may help loosen a partial blockage.
Avoid repeatedly pouring harsh chemical drain cleaners into plumbing without understanding whether they are appropriate for your pipes and situation.
If multiple drains are slow at the same time, or wastewater is backing up, the issue may be farther along the drainage system.
That is a good point to seek professional assistance.


Fixing a Loose Cabinet Handle
Kitchen and bathroom handles receive frequent use, so screws can gradually loosen.
Use the correct screwdriver and tighten the mounting screws.
If the screw no longer grips, inspect the cabinet material.
Repeatedly tightening a screw into damaged material will not solve the underlying problem.
Depending on the cabinet construction, you may need a suitable replacement fixing or another repair method.
If you are replacing the handle entirely, measure the distance between the existing mounting holes before buying the replacement.
Fixing a Drawer That Does Not Close Properly
Pull the drawer out and inspect the runners.
Look for objects blocking the mechanism, loose screws, or visible damage.
Clean away dust and debris.
Tighten loose hardware.
If the drawer is overloaded, remove some of its contents and test it again.
A drawer that still jams may have a damaged runner or alignment problem.
Replacing a damaged runner can be relatively straightforward, but measure the existing hardware carefully before purchasing a replacement.


Fixing a Loose Towel Rail or Shelf
A wall-mounted item that begins pulling away from the wall should not simply be screwed back into the same hole.
The original fixing may have failed.
Remove the item and inspect the wall.
Determine whether it is plasterboard, masonry, timber, or another material.
Choose a fixing designed for that surface and for the weight the item needs to support.
For heavier shelves, do not rely on a small generic wall plug simply because it fits the hole.
The fixing and the wall structure both need to be capable of carrying the load.
Repairing a Loose Curtain Rail
A curtain rail can become loose because the screws have pulled out, the wall fixing is unsuitable, or the rail is carrying too much weight.
Remove the rail and inspect the mounting points.
If the wall material has crumbled, installing a larger screw into the same damaged area may not solve the problem.
Use an appropriate fixing for the wall type.
For heavy curtains, ensure the brackets are securely attached to suitable supporting material.


Repairing Damaged Silicone Around a Sink
Old silicone around a sink, bath, or worktop can become discoloured, cracked, or detached.
When this happens, water may find its way into unwanted areas.
Remove the old sealant carefully.
Clean the surface thoroughly and allow it to dry.
Apply a suitable sanitary sealant according to the manufacturer’s instructions.
Create a smooth finish before the sealant begins to cure.
Do not apply new sealant directly over mouldy or failing old material and expect a lasting repair.
If moisture has already damaged the surrounding wall, cabinet, or flooring, deal with that problem first.
Fixing a Leaking Sink Trap
A leak underneath a sink may come from a loose connection or worn seal.
Place a container underneath before taking anything apart.
Tighten accessible connections gently.
If necessary, disassemble the trap carefully and inspect the seals.
Replace damaged seals with suitable parts and reassemble the connection.
Run water slowly and check every joint.
Do not overtighten plastic fittings because excessive force can damage them.


Fixing a Clogged Showerhead
Mineral deposits can build up inside showerhead openings over time, particularly in areas with hard water.
Remove the showerhead if the design allows.
Clean the openings and rinse away loosened deposits.
A suitable descaling method can help with mineral buildup, but follow the manufacturer’s recommendations and avoid using chemicals that could damage the finish.
If water pressure remains poor throughout the house, the showerhead may not be the real problem.
A broader plumbing or supply issue may need investigation.
Repairing Squeaky Floorboards
A squeaky floor can result from movement between flooring materials and supporting timber.
If the squeak is accessible from above, identifying the exact location is important before attempting any repair.
Do not randomly drive screws into a floor.
There may be pipes, cables, or other services beneath it.
If you cannot confidently identify what is underneath the flooring, stop and investigate before drilling or screwing.
Some floor repairs are better handled from below or by someone familiar with the building’s construction.


Fixing a Drafty Door
A noticeable draft around an exterior door may be caused by worn weatherstripping, gaps around the frame, or poor door adjustment.
Check the seal around the edges.
If the weatherstripping is damaged or compressed, replacing it may help.
Inspect the bottom of the door as well.
A suitable door sweep or seal can reduce unwanted airflow when correctly fitted.
If the draft comes from gaps around the frame, the problem may require a different repair.
Do not block ventilation openings that are intentionally part of the home’s design.
Improving a Drafty Window
Check whether the window closes properly.
Inspect visible seals and gaps.
Temporary solutions such as suitable window film can sometimes help reduce drafts, while damaged seals or frame problems may need a more permanent repair.
If condensation occurs between sealed panes of double glazing, the sealed unit may have failed and may need specialist replacement rather than a simple DIY fix.


Fixing a Loose Fence Panel
Outdoor timber can move, deteriorate, and loosen over time.
Inspect the posts, rails, and panels.
If only a screw or fixing has loosened, replacing it with a suitable fixing may be enough.
If the timber is rotten, replacing one damaged section may be more sensible than repeatedly repairing it.
Check the posts as well.
A panel attached to a weak or rotting post will not remain secure for long.
Repairing Small Garden Problems
Some outdoor improvements are simple DIY tasks.
You can:
- Replace damaged planters
- Repair small sections of edging
- Clean outdoor surfaces
- Tighten loose gate hardware
- Replace simple garden hardware
- Clear leaves from suitable drainage areas
Work carefully around underground utilities and avoid digging where you do not know what is beneath the surface.
Fixing a Loose Picture Frame
A crooked or loose picture frame may simply need better positioning or a more suitable wall fixing.
For light frames, an appropriate picture hook may be sufficient.
For heavier frames, choose a fixing based on the wall material and weight.
Measure carefully before drilling.
If the frame is going above a bed, sofa, or other area where someone could be injured if it falls, make sure the fixing is secure and appropriate for the load.


Repairing Scratched Wooden Furniture
Minor scratches on wooden furniture can often be made less noticeable without replacing the piece.
First clean the surface.
Determine whether the damage is only to the finish or has reached the wood itself.
For superficial marks, a suitable furniture repair product may help.
Follow the product instructions and test it on an inconspicuous area first.
Do not use aggressive sanding on valuable or antique furniture unless you understand the finish and are comfortable restoring it.
Fixing a Wobbly Chair
Turn the chair over and inspect the joints.
Loose screws or bolts can often be tightened.
Wooden joints may require a suitable adhesive repair if they have separated.
Do not use a chair that feels structurally unsafe until it has been repaired.
A small wobble can become a fall hazard if ignored.
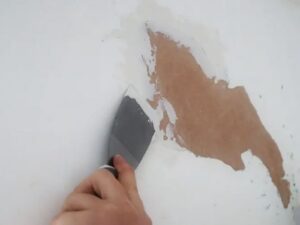
Fixing Peeling Paint
Peeling paint can result from poor surface preparation, moisture, incompatible coatings, or age.
Do not simply paint over the loose area.
Scrape away unstable paint carefully.
Prepare the surface.
If moisture is involved, identify and address the source before repainting.
Once the surface is stable and dry, use an appropriate primer and paint system.
If peeling is widespread or returns quickly, investigate the underlying cause rather than repeatedly adding new coats.


Fixing Minor Mould Problems
Small areas of surface mould can sometimes be cleaned, but the important question is why the mould appeared.
Persistent moisture, condensation, leaks, poor ventilation, and water intrusion can all contribute.
Improve ventilation where appropriate and repair leaks.
When cleaning mould, follow suitable safety precautions and the instructions for the cleaning product you use.
Do not simply paint over mould and assume the problem has disappeared.
If mould is widespread, keeps returning, involves hidden areas, or may be connected to significant water damage, professional assessment may be appropriate.
Fixing a Damaged Tile
A single cracked tile does not always mean an entire floor or wall needs replacing.
If the surrounding surface is stable and you can obtain a matching tile, replacing the damaged tile may be possible.
Work carefully when removing the old tile.
Wear eye protection and avoid damaging nearby tiles or the underlying surface.
Before installing the replacement, check why the original tile cracked.
Impact may have caused the damage, but movement or an unstable substrate can cause cracks to return.


When a DIY Repair Should Stop
Knowing when not to continue is an important DIY skill.
Professional help may be appropriate for:
- Major electrical faults
- Gas-related work
- Serious plumbing leaks
- Structural cracks or movement
- Roof work involving significant height
- Extensive mould or water damage
- Major drainage problems
- Suspected hazardous building materials
- Repairs involving important hidden wiring or pipes
A repair that saves money but creates a safety risk is not a successful repair.
If you are unsure, stop and get advice before making the situation worse.
Common DIY Mistakes to Avoid
Rushing the Job
Taking another ten minutes to understand the problem can save hours later.
Using the Wrong Fixing
A screw or wall plug is not automatically suitable just because it fits.
Overtightening
More force does not always mean a stronger repair. It can damage screws, fittings, plastic components, and surrounding materials.
Ignoring the Cause
A new coat of paint will not solve a leak.
A new screw will not solve rotten wood.
A replacement seal will not solve movement in a damaged structure.
Skipping Preparation
Cleaning, measuring, drying, and preparing surfaces often determine whether a repair lasts.
Forgetting to Test the Repair
After completing a repair, test it carefully.
Run water slowly after plumbing work.
Open and close a repaired door.
Put normal—not excessive—weight on a repaired shelf.
Look for leaks or movement.


A Simple DIY Repair Process
When faced with a household problem, use this basic process.
Step 1: Identify the Problem
Describe exactly what is wrong.
Step 2: Find the Cause
Look beyond the visible symptom.
Step 3: Check for Safety Risks
Determine whether electricity, gas, structural components, hidden pipes, or other hazards could be involved.
Step 4: Gather the Correct Tools
Use equipment and materials designed for the job.
Step 5: Protect the Area
Cover nearby surfaces and keep children and pets away from the work area when necessary.
Step 6: Make One Change at a Time
This makes it easier to understand what fixed the problem.
Step 7: Test the Result
Check carefully before returning the area to normal use.
Step 8: Monitor It
Some repairs appear successful initially but reveal problems later.
Watch for recurring leaks, cracks, movement, or other warning signs.
Final Thoughts
Simple DIY home repairs can save money, reduce frustration, and help you understand how your home works.
The most useful approach is not to become an expert at everything. It is to learn how to recognise straightforward problems and handle them carefully.
Tightening a loose handle, repairing a small wall hole, replacing suitable sealant, cleaning a blocked drain, adjusting a door, or improving a drafty window may be manageable for a confident beginner.
But there is an important boundary.
Electrical faults, gas work, major leaks, structural problems, serious water damage, and other hazardous jobs should not be treated as ordinary DIY projects.
Start small.
Use the right tools.
Understand the cause before repairing the symptom.
And never let saving money become more important than keeping your home and the people in it safe.
Frequently Asked Questions
What home repairs are easiest for beginners?
Simple jobs such as tightening loose handles, filling small wall holes, replacing suitable sealant, adjusting cabinet hardware, lubricating hinges, and improving basic door or window seals can be good starting points.
What tools should every beginner have?
A basic toolkit can include screwdrivers, pliers, an adjustable wrench, hammer, tape measure, utility knife, spirit level, drill, suitable drill bits, and basic safety equipment.
Should I repair a leaking tap myself?
A minor tap problem may be manageable if you can safely isolate the water supply and identify the correct replacement component. If the leak continues or you cannot determine the cause, professional assistance may be appropriate.
Can I fix a cracked wall myself?
Small surface cracks may sometimes be repaired with suitable filler and paint. However, cracks that are large, widening, recurring, or associated with other signs of movement should be investigated more carefully.
How can I fix a slow drain?
Start by removing visible debris and using an appropriate plunger. If multiple drains are affected or water backs up repeatedly, the blockage may be farther into the plumbing system.
Why should I avoid painting over peeling paint?
Peeling paint often indicates a surface-preparation or moisture problem. Painting over unstable material usually produces another failed finish rather than solving the underlying issue.
When should I call a professional for a home repair?
Consider professional help when a repair involves gas, major electrical work, structural concerns, significant water damage, hazardous materials, unsafe heights, or a problem you cannot confidently diagnose.
Is DIY always cheaper than hiring a professional?
Not necessarily. A failed repair can increase material costs and create additional damage. DIY makes the most sense when the job is appropriate for your skill level and can be completed safely.
How can I avoid making a DIY problem worse?
Understand the cause first, use suitable materials, follow manufacturer instructions, avoid excessive force, protect surrounding areas, and stop when the job moves beyond your knowledge or safety limits.
What is the most important DIY home repair skill?
Knowing your limits is one of the most valuable skills. A good DIYer knows how to complete simple repairs but also recognises when a problem requires specialist knowledge or equipment.
:::